Step by step, with pictures
Show me every step with screenshots.
This is the whole of Stepped Layers once through, with a picture of the studio at every step. The example is a lotus mandala cut from five sheets of 1/4" plywood, and it ends with the files you take to the laser. Your own piece follows exactly the same steps.
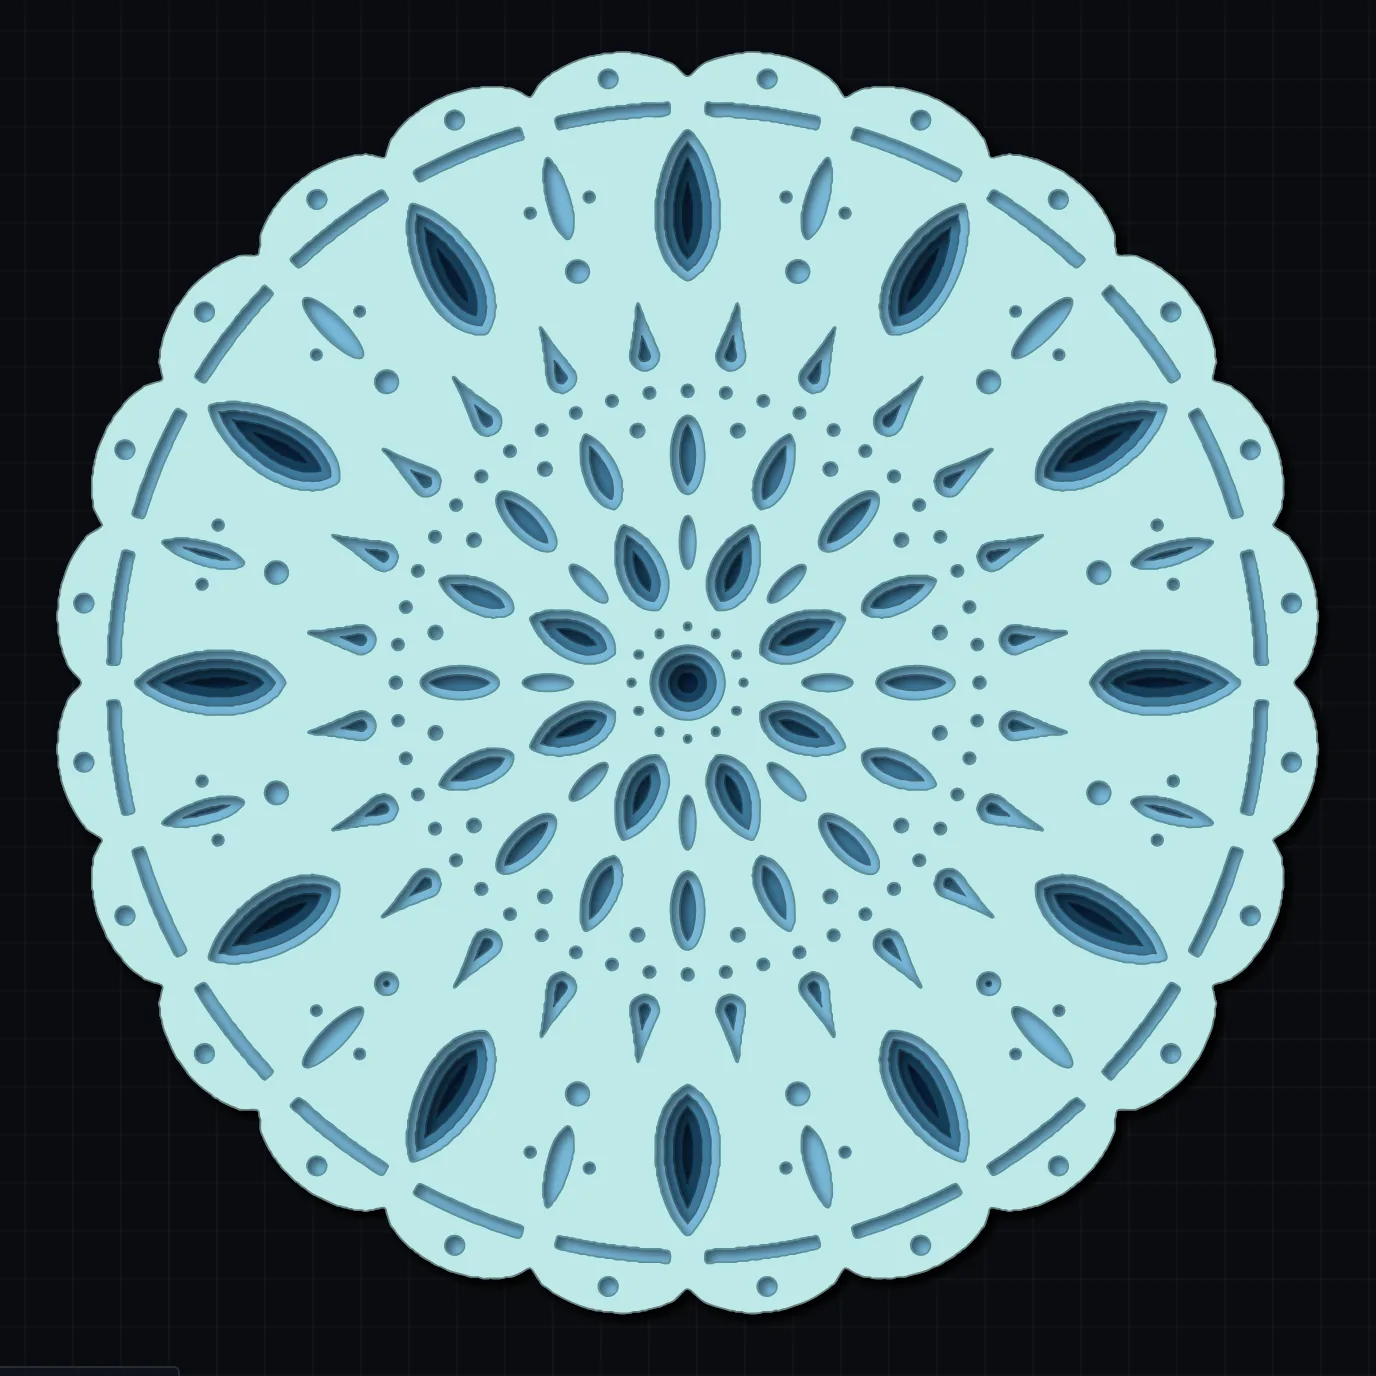
The studio at a glance
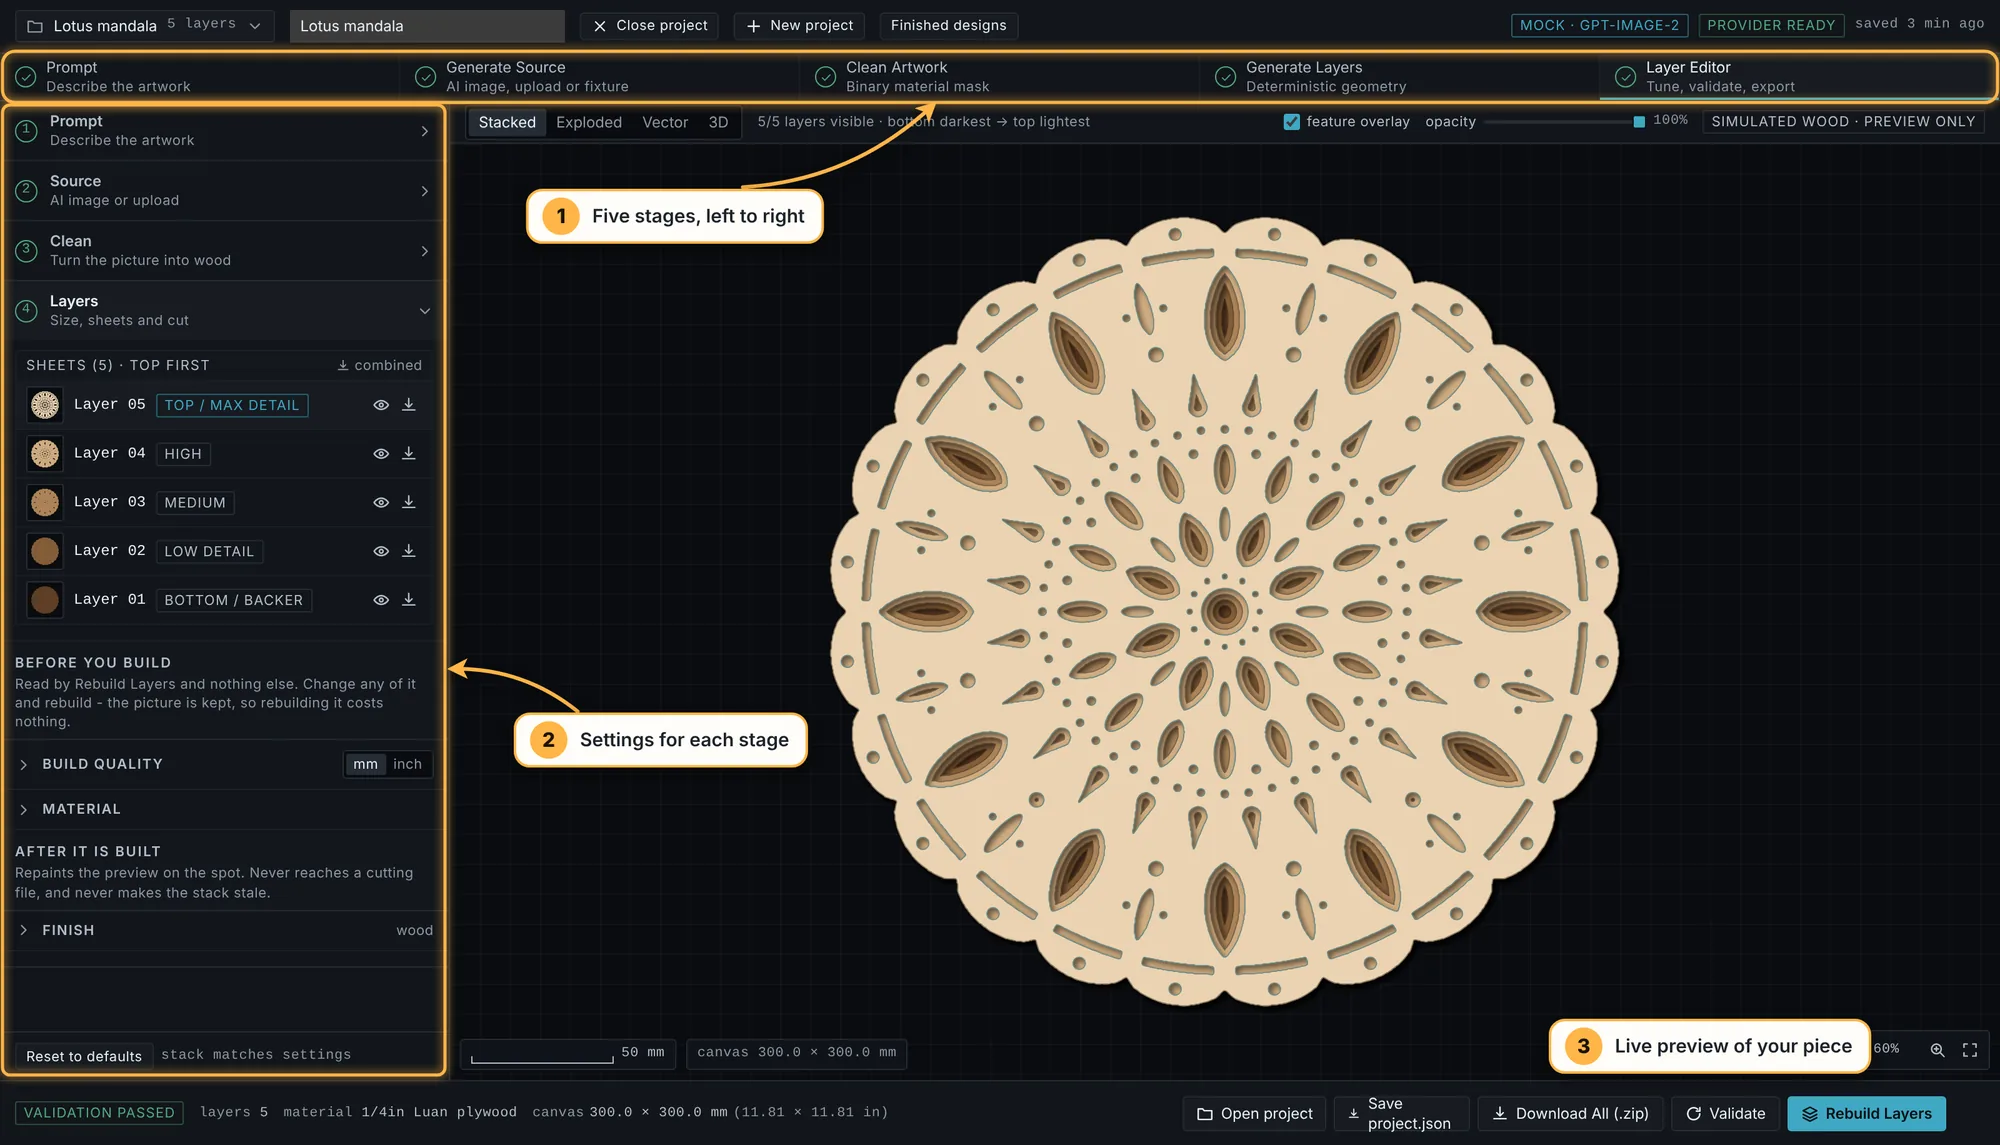
The studio works left to right through five stages, shown across the top. You can go back to any of them at any time, and pressing one takes you there. The pane on the left holds the settings for the stage you are on, and the big area on the right shows what you have so far.
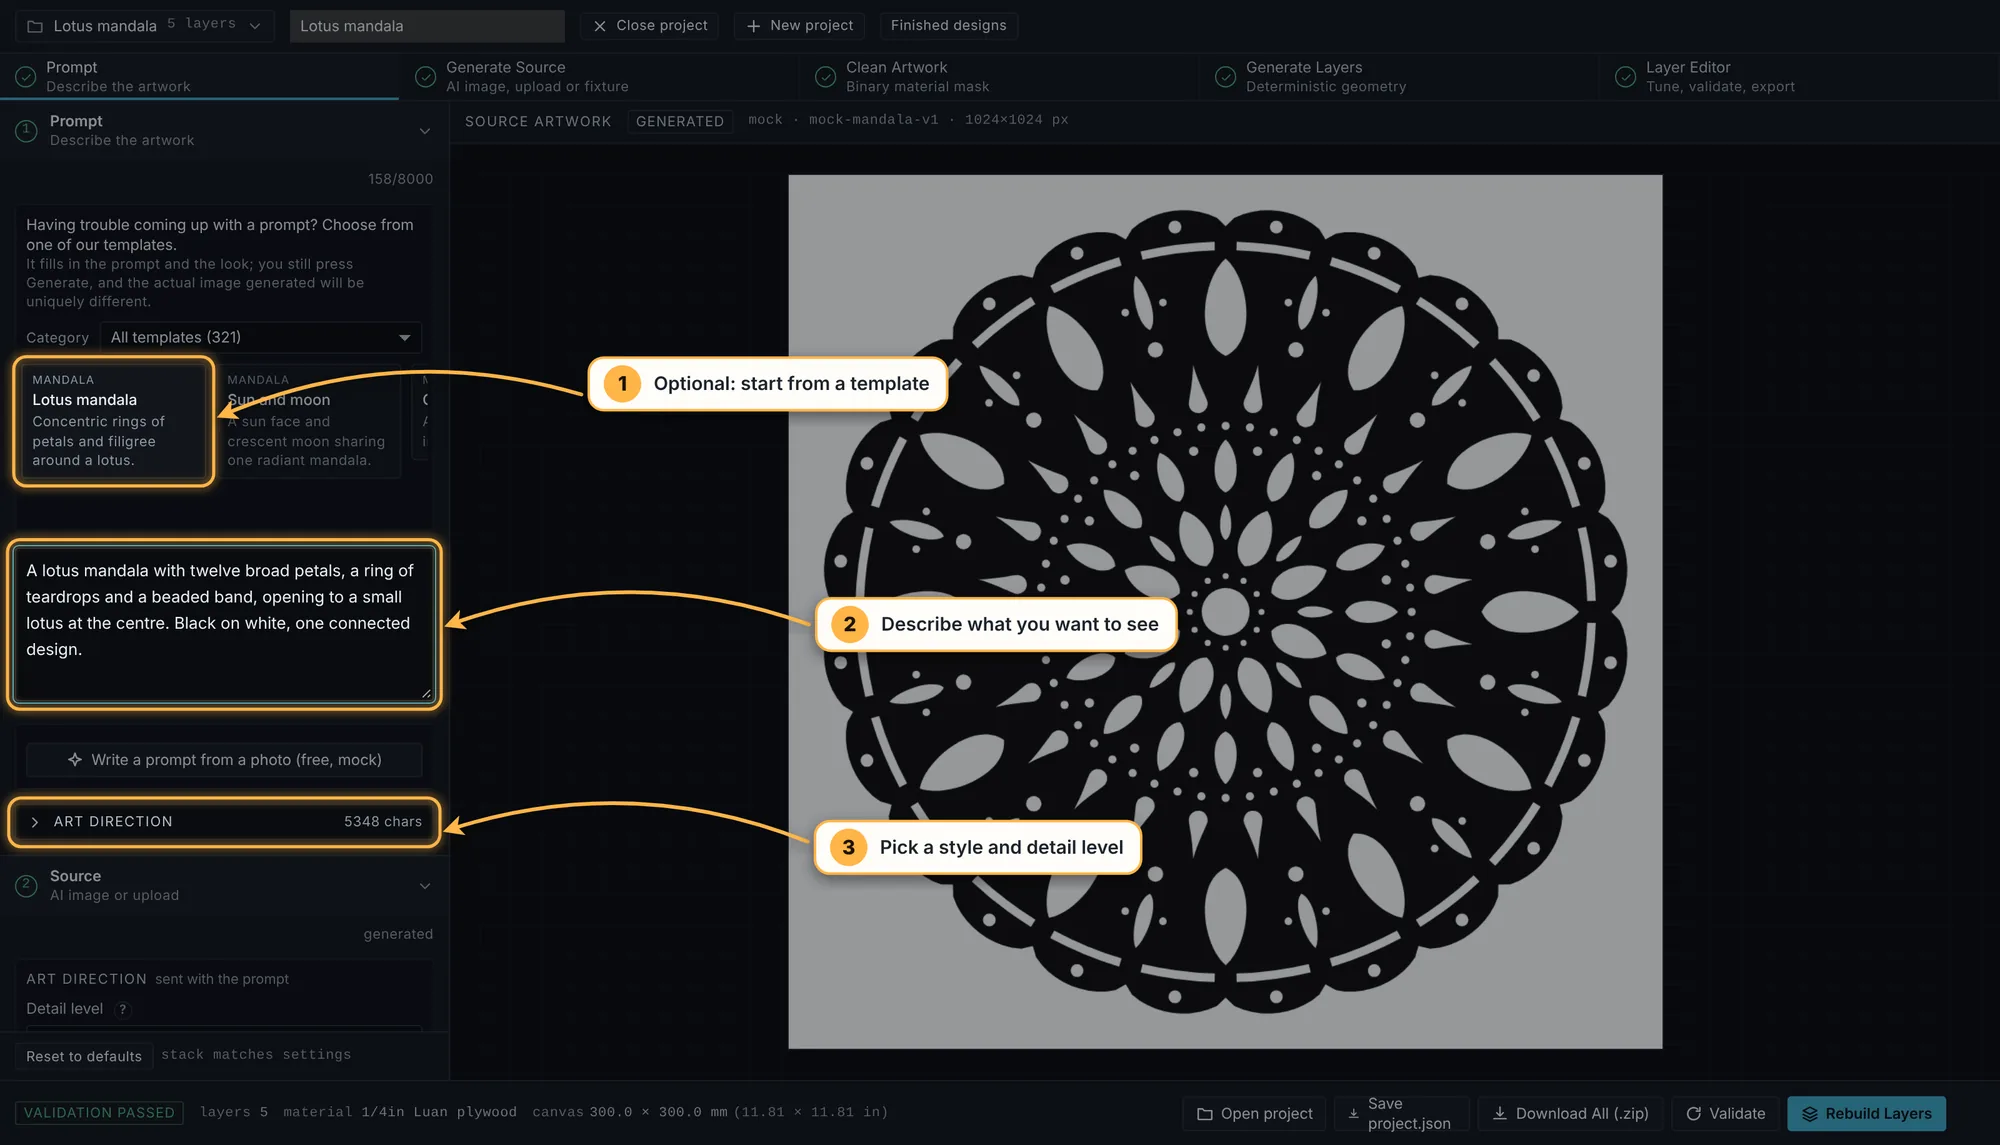
1. Describe your design
Press New project at the top of the studio, then describe what you want to see in the prompt box. A sentence is plenty: "a lotus mandala with twelve broad petals, a ring of teardrops and a beaded band". If you would rather not write one, pick a card from the template shelf above the box and it fills the prompt in for you.
Open Art direction underneath to choose a style and how detailed the picture should be.
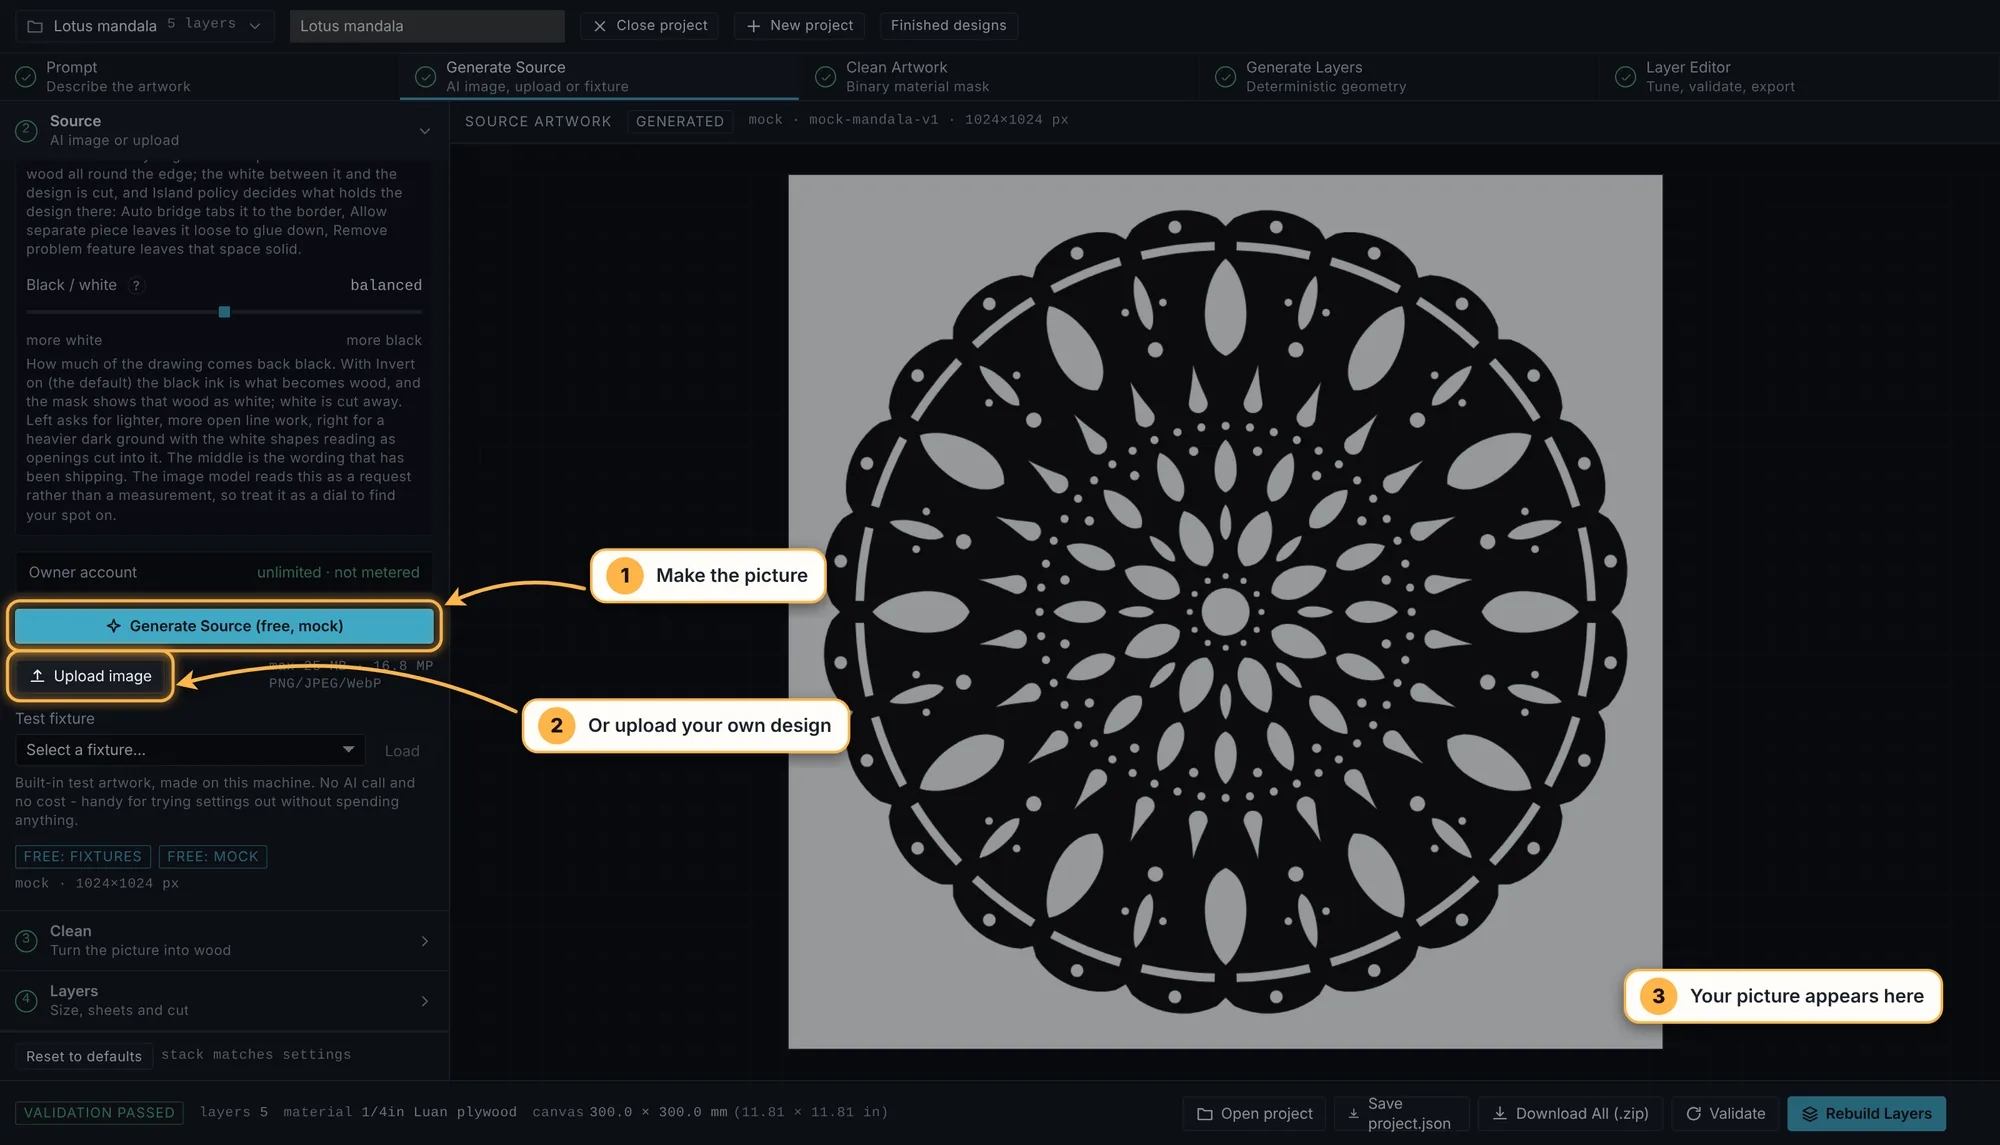
2. Make the picture
Press Generate Source. The picture appears on the right in under a minute. If it is not what you wanted, change the words and generate again.
Already have a design? Press Upload image instead. Uploading is free, and everything after this step works the same way.
3. Check the black and white
The studio turns your picture into flat black and white, because that edge is what the laser follows. The right-hand view is the sheet as it will be cut: white is wood and black is cut away. Usually it is right first time and you can move straight on.
If the wood and the holes have come out the wrong way round, flip Invert. After changing anything here, press Re-clean to see the result.
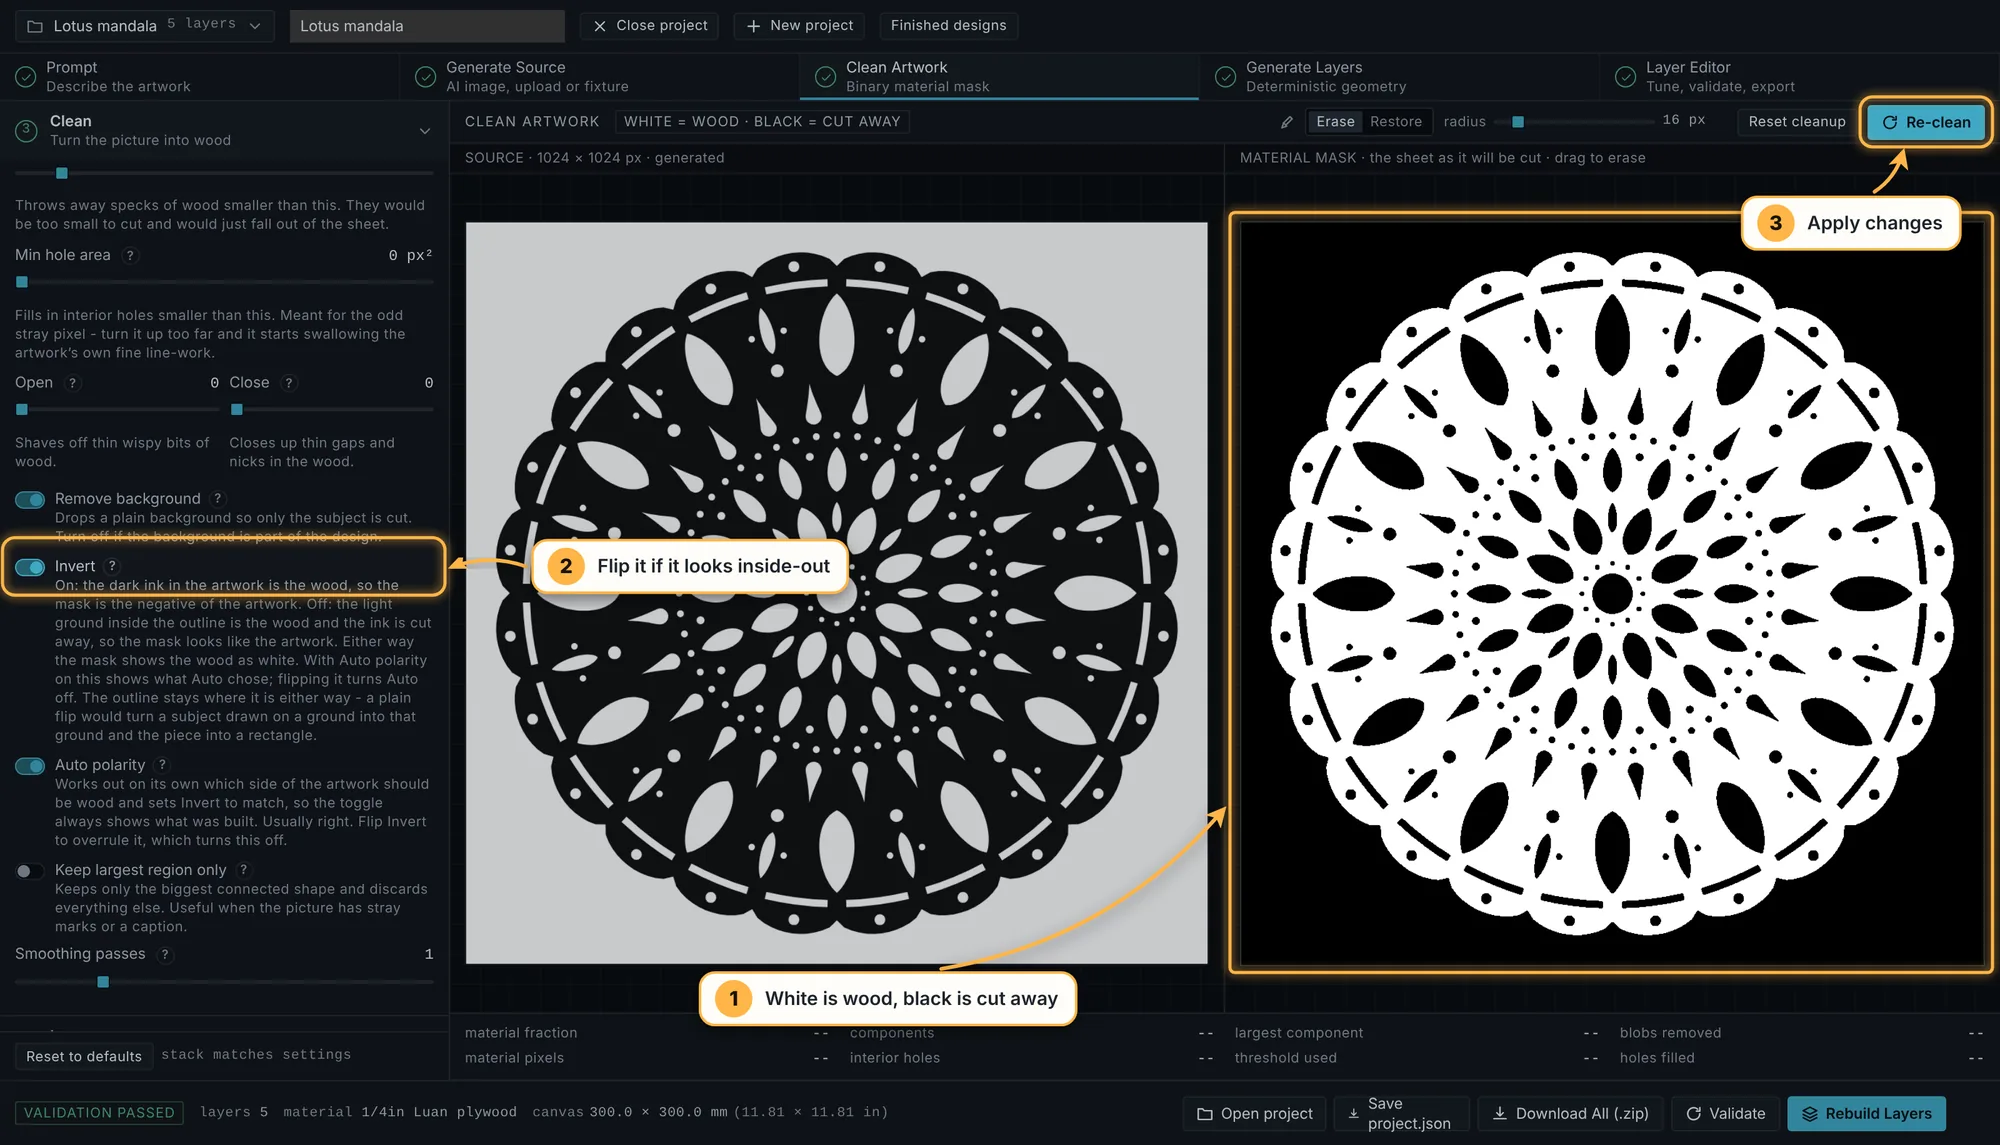
If it looks muddy or speckled, Cleaning the artwork explains the other controls.
4. Choose the size and the layers
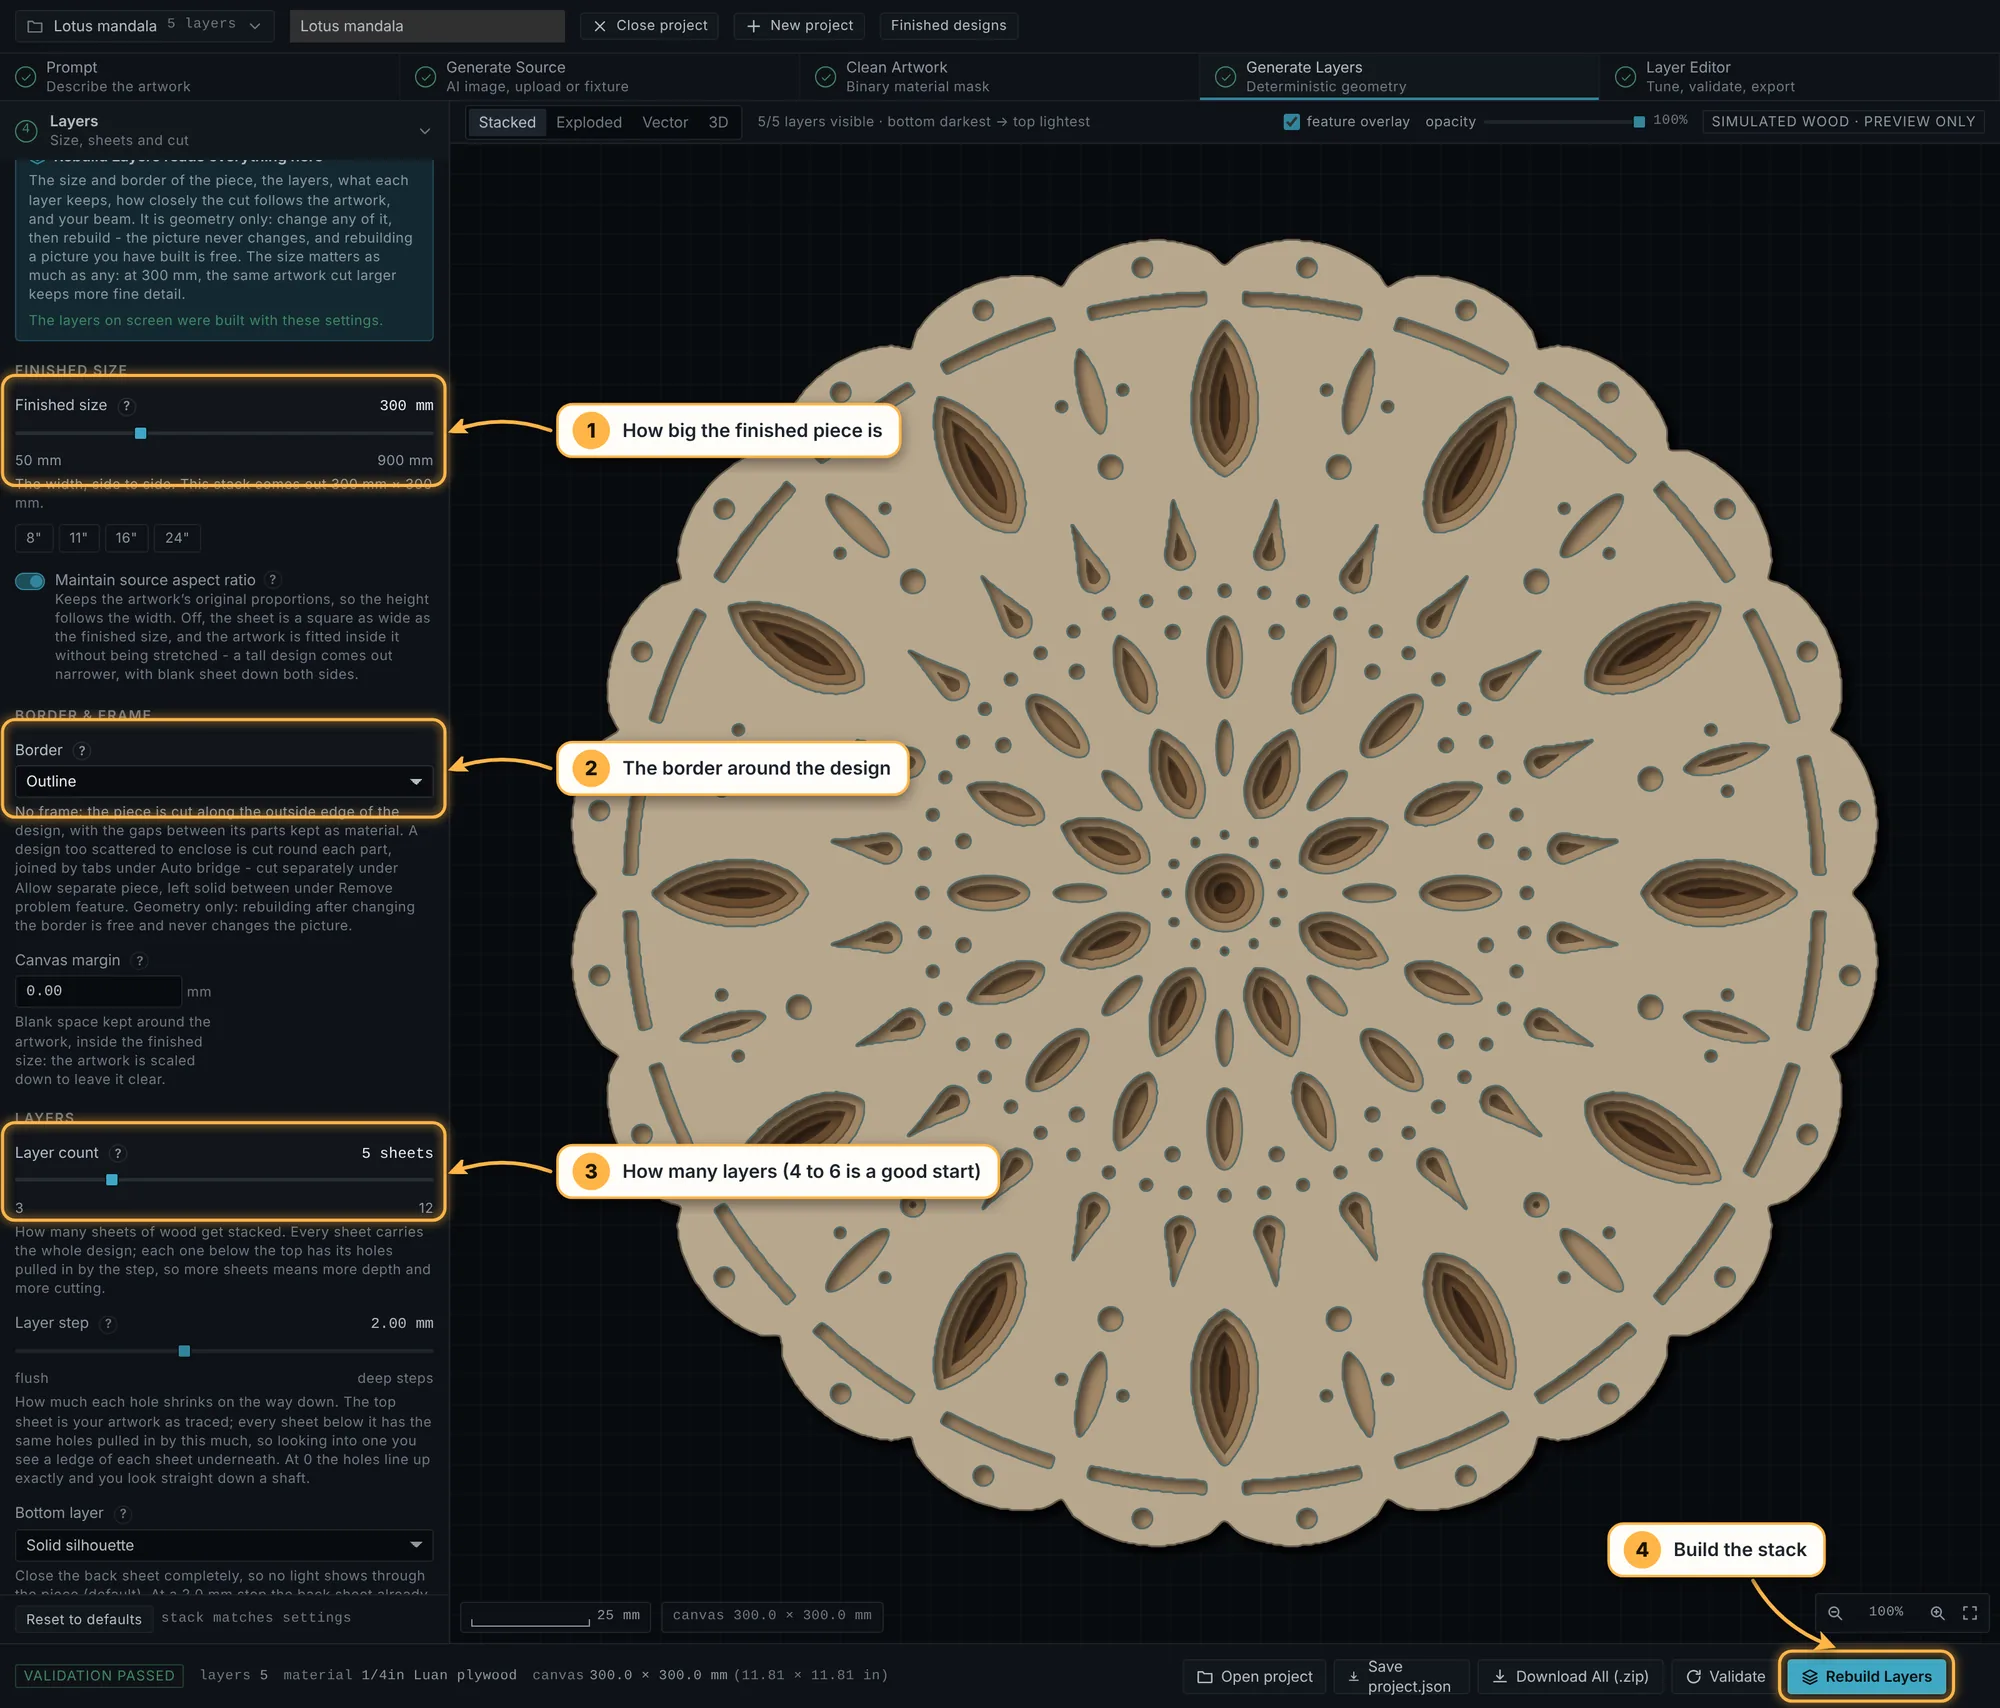
Go to Generate Layers and open Build quality in the pane. The settings that matter most for a first piece are:
- Finished size: how wide the finished piece is. The 8", 11", 16" and 24" buttons underneath set common bed sizes in one press.
- Border: Outline cuts round the edge of the design, as here. Frame, Open frame and Circle set it inside a border instead.
- Layer count: how many sheets get stacked. Four to six is a good first piece. See how many layers.
Then press Generate Layers at the bottom right. It is geometry rather than AI, and takes a minute or two.
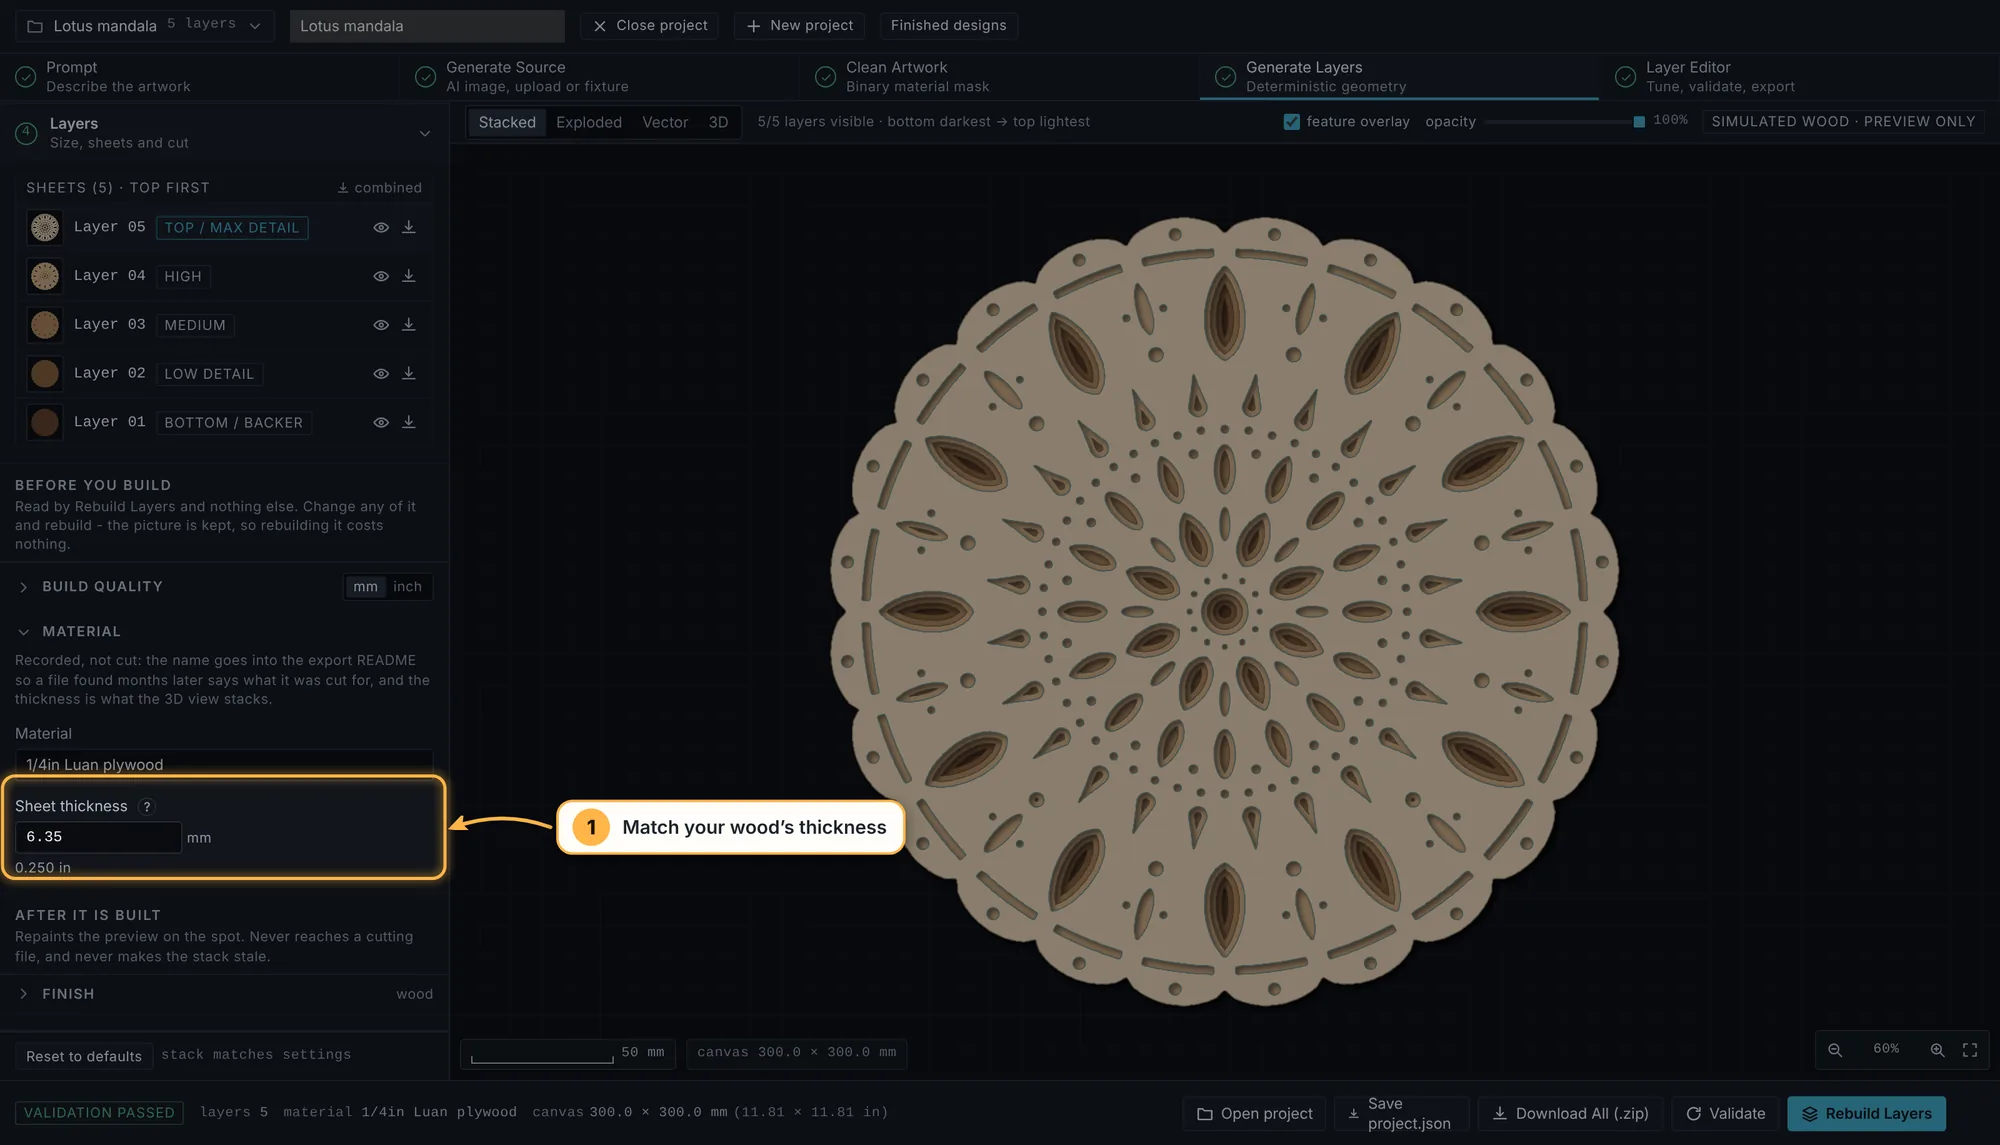
Open Material as well and set Sheet thickness to the wood you are cutting. It does not change the cut files, but it makes the 3D view stack to the right height.
5. Look at your stack
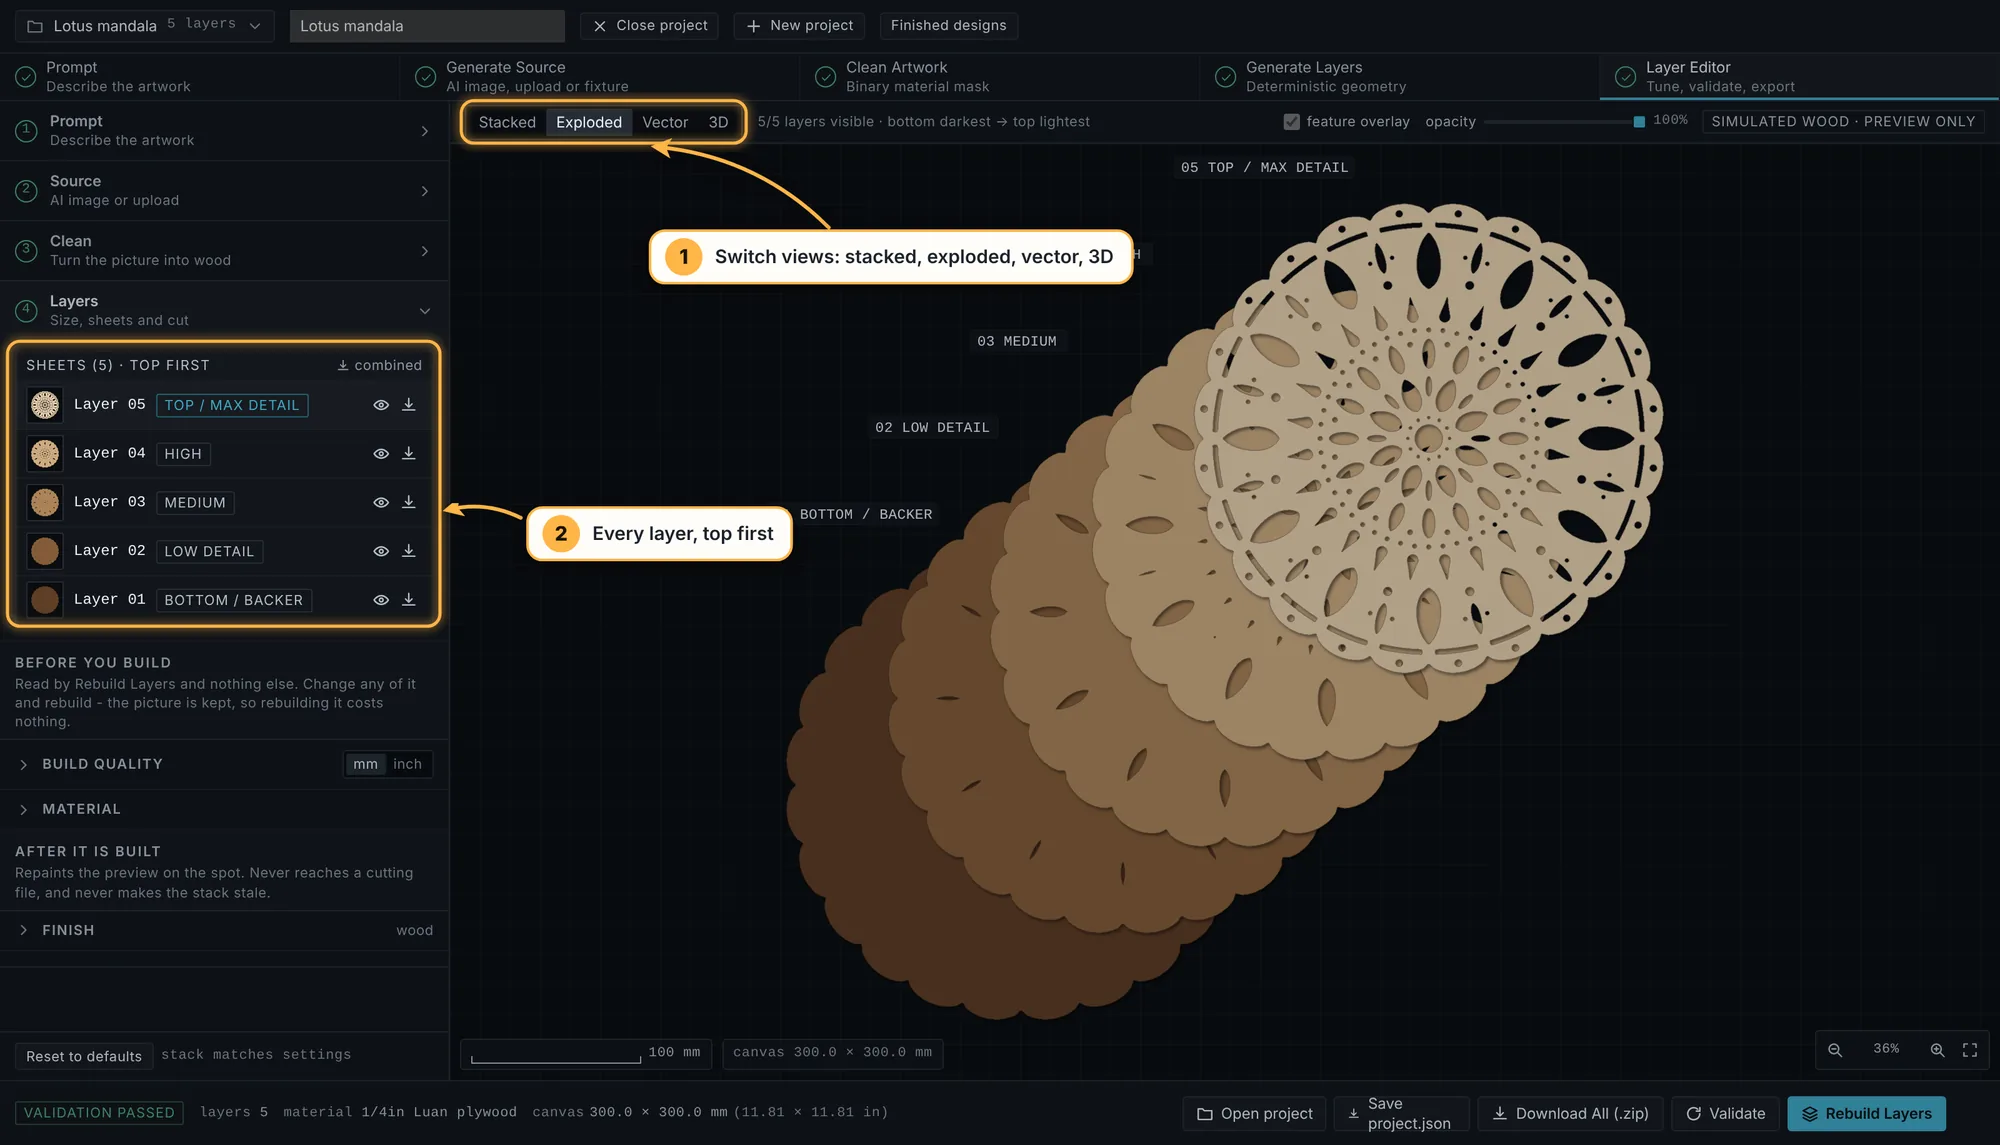
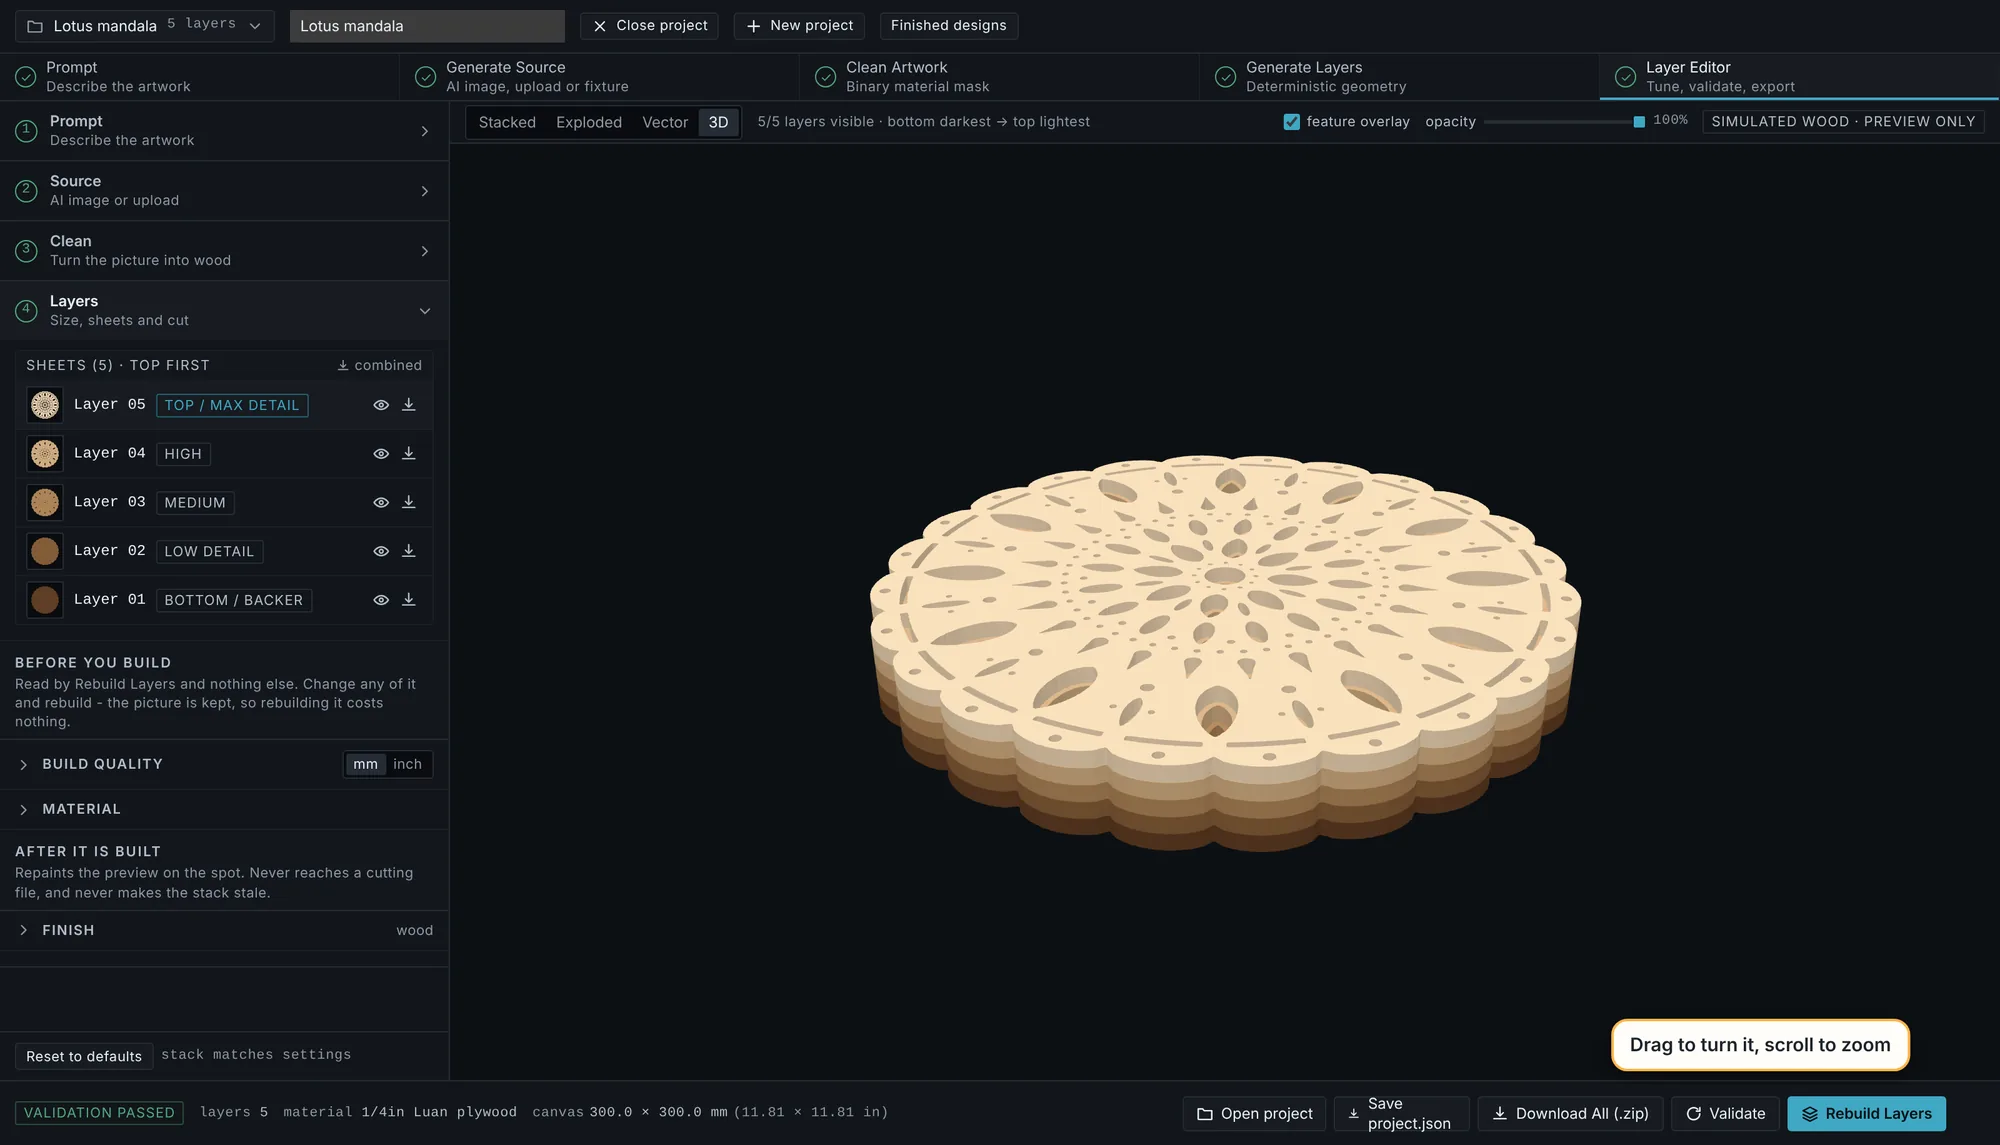
When the build finishes, go to Layer Editor. The buttons above the preview switch between four views: Stacked (the piece as it will hang), Exploded (the layers pulled apart), Vector (the cut lines of one layer) and 3D. The list on the left has every layer, top first, with an eye to hide one and an arrow to download just that one.
In 3D, drag to turn the stack over and scroll to zoom in on the steps.
6. Try a painted finish (optional)
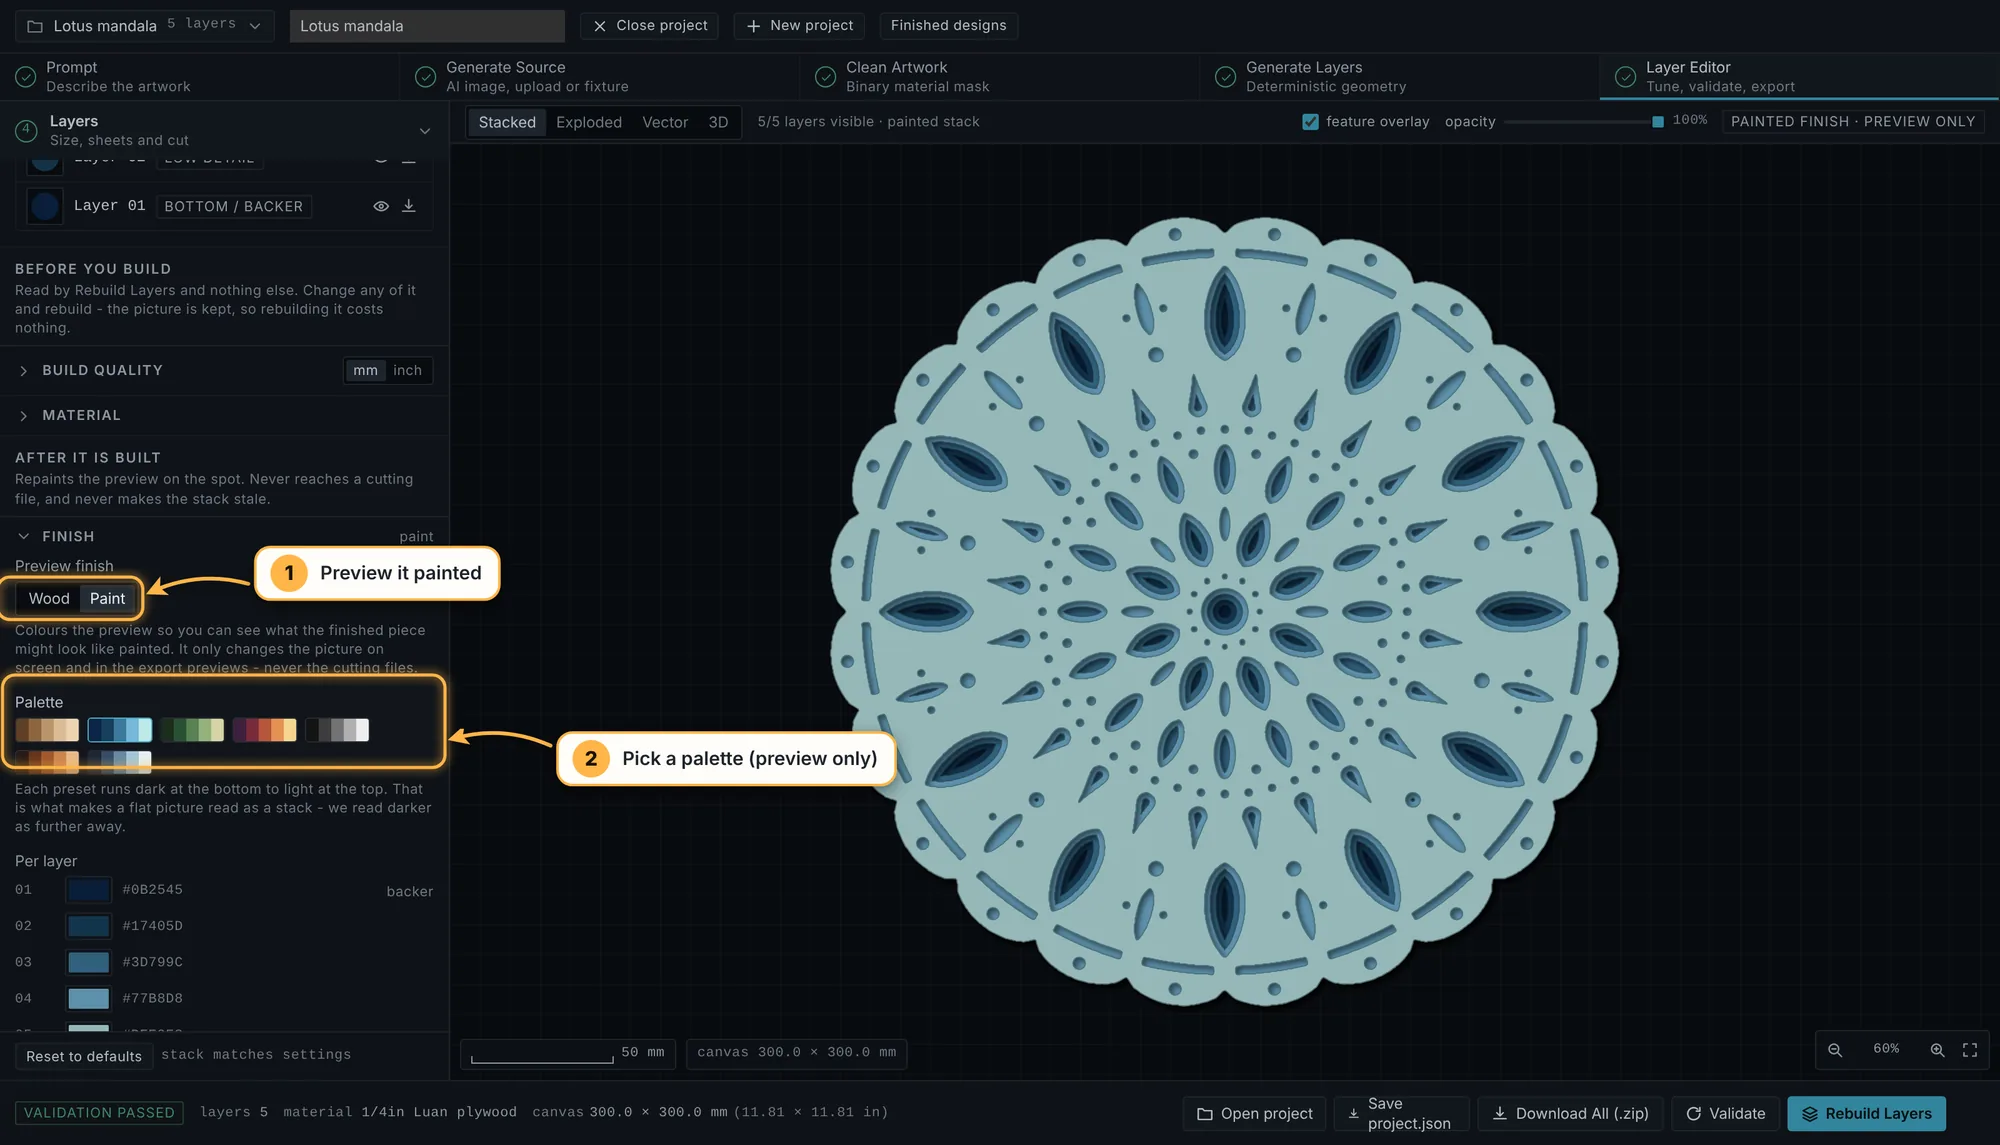
Open Finish in the pane and switch Preview finish to Paint to see the piece in colour. Pick a palette, or set each layer's colour yourself underneath. This only changes the preview; the cut files are the same either way.
7. Check it and download
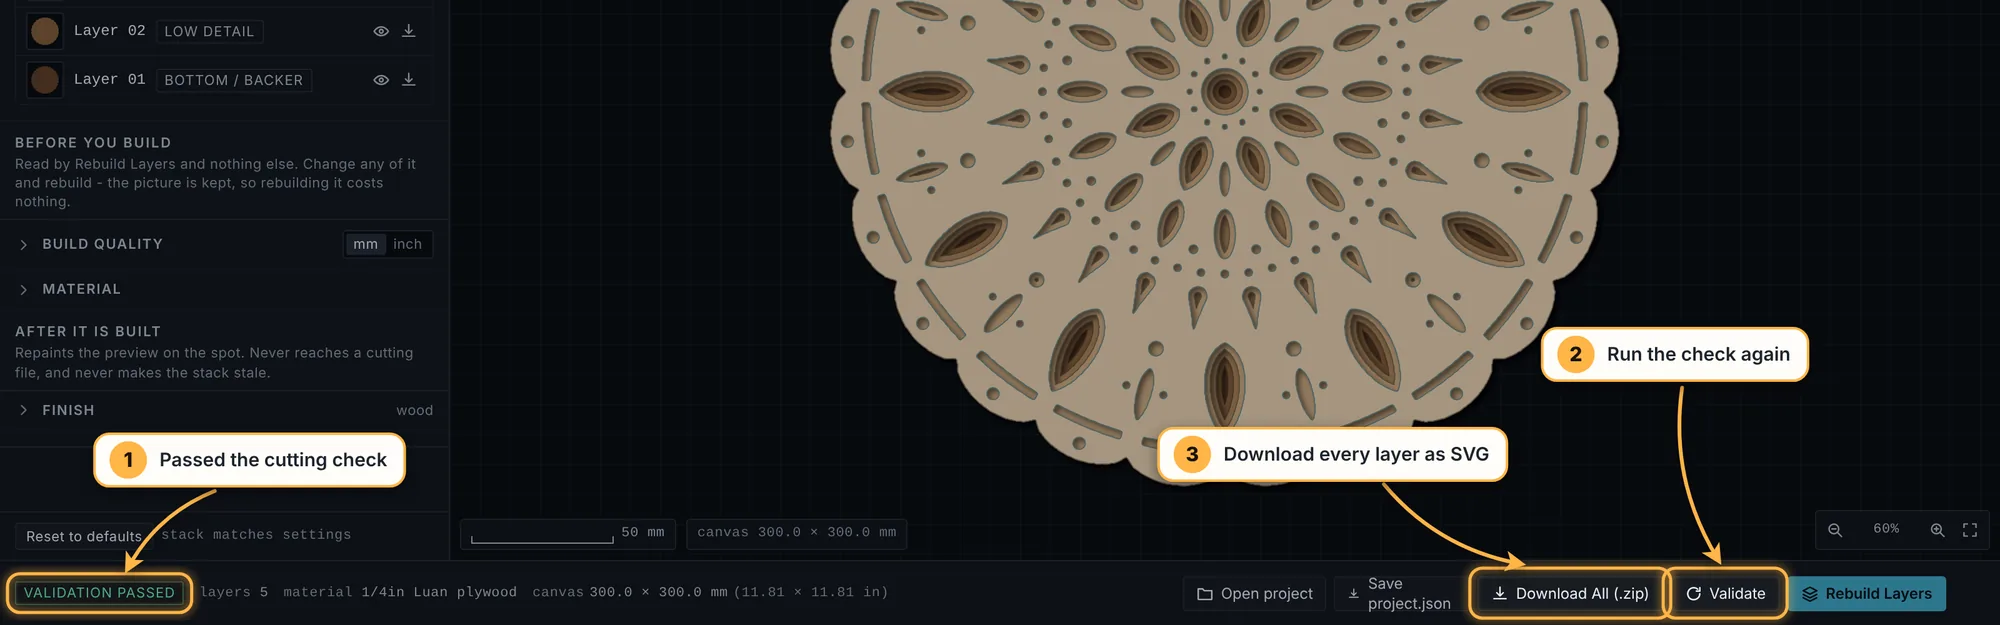
Every build is checked for the things that go wrong on a cutter, such as pieces that would fall out or details too thin to survive. The badge at the bottom left shows the result: Validation passed means it is ready to cut. Validate runs the check again.
Press Download All (.zip) to get every layer as an SVG, with a README.txt that lists what the check found.
If the check found a problem, Reading the check explains each message and how to fix it. Then take your files to the laser: Exporting your files and On the cutter cover the rest.
Still stuck? Write to hello@mandalalayers.com — a person reads it, and a photograph of what came off your cutter helps more than a description.