Your first scene, step by step
Walk me through a landscape once, with screenshots.
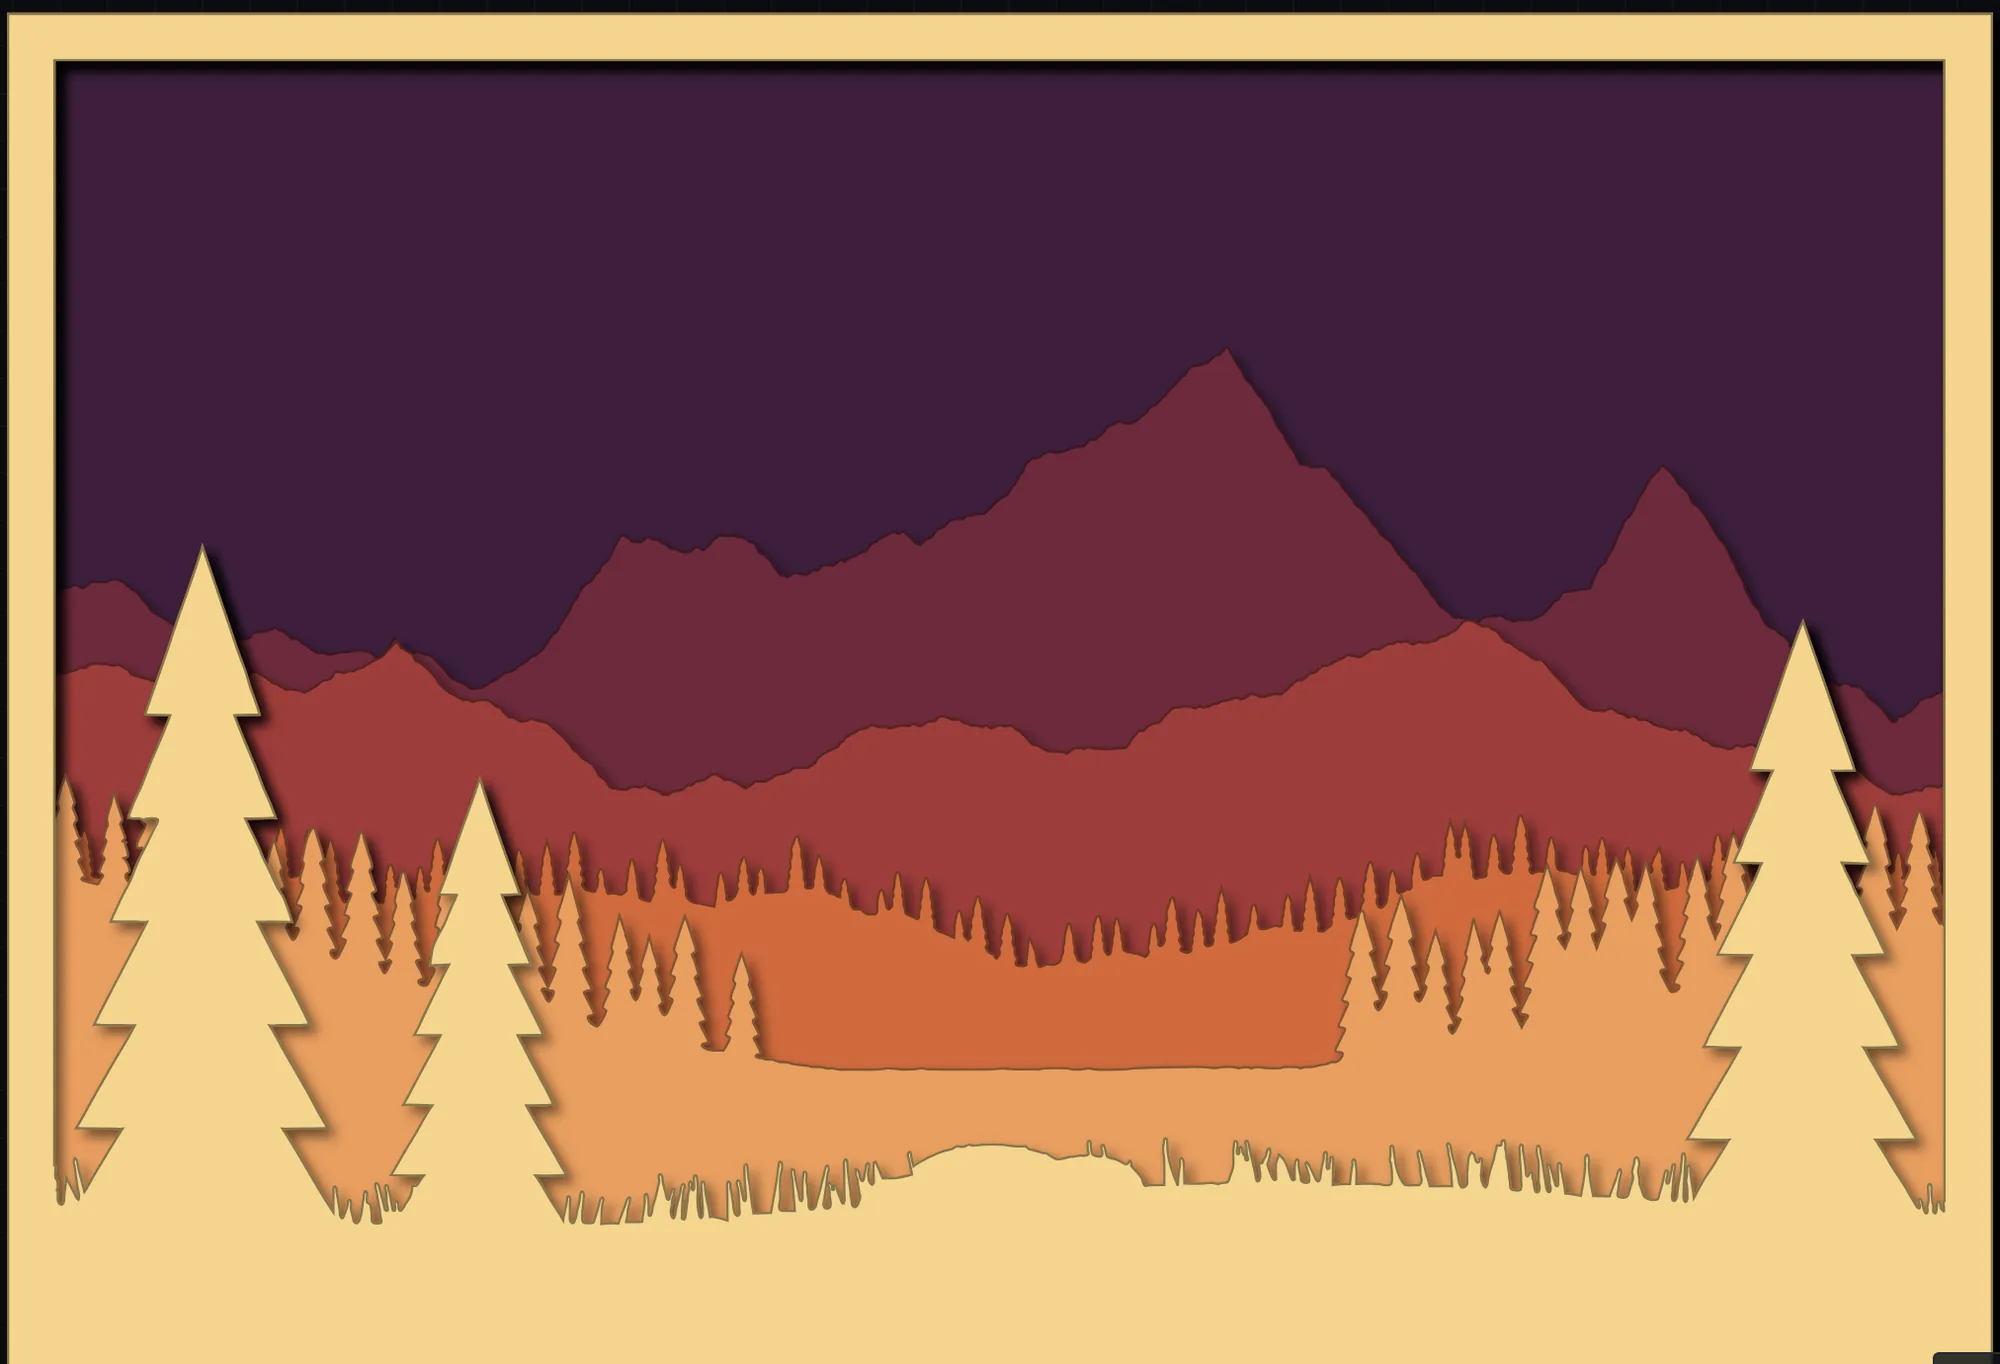
This is the whole of Landscape Silhouette Layers once through, with a picture of the studio at every step. The example is a mountain lake at dusk cut from six sheets, nearest at the front and the sky at the back, and it ends with the files you take to the laser. Your own scene follows exactly the same steps.
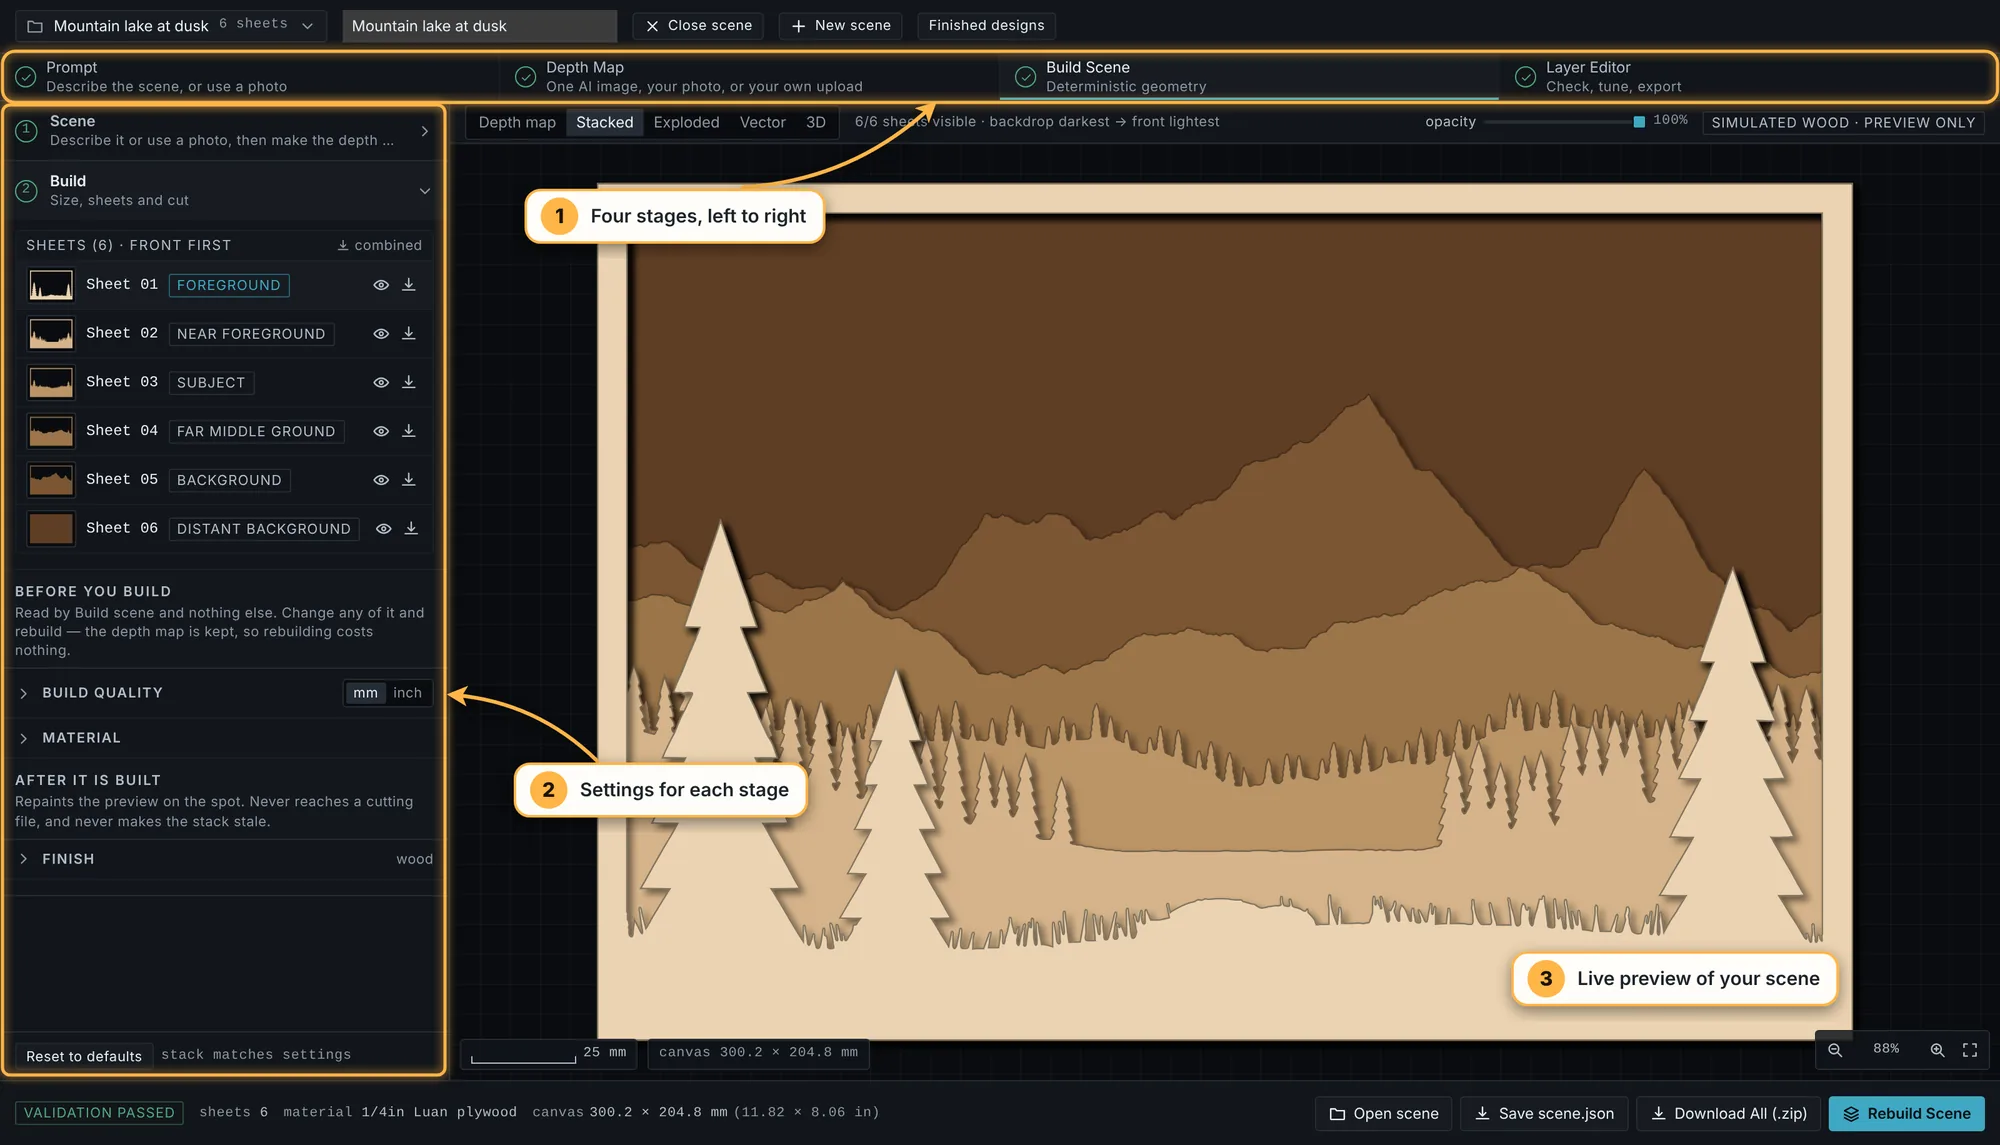
The studio at a glance
The studio works left to right through four stages, shown across the top: Prompt, Depth Map, Build Scene and Layer Editor. You can go back to any of them at any time. The pane on the left holds the settings, and the big area on the right shows your scene.
Unlike Stepped Layers, every sheet here is a different part of the picture. Sheet 1 is the front (the grass and the tall pines), and the last sheet is the backdrop (the sky).
1. Describe your scene
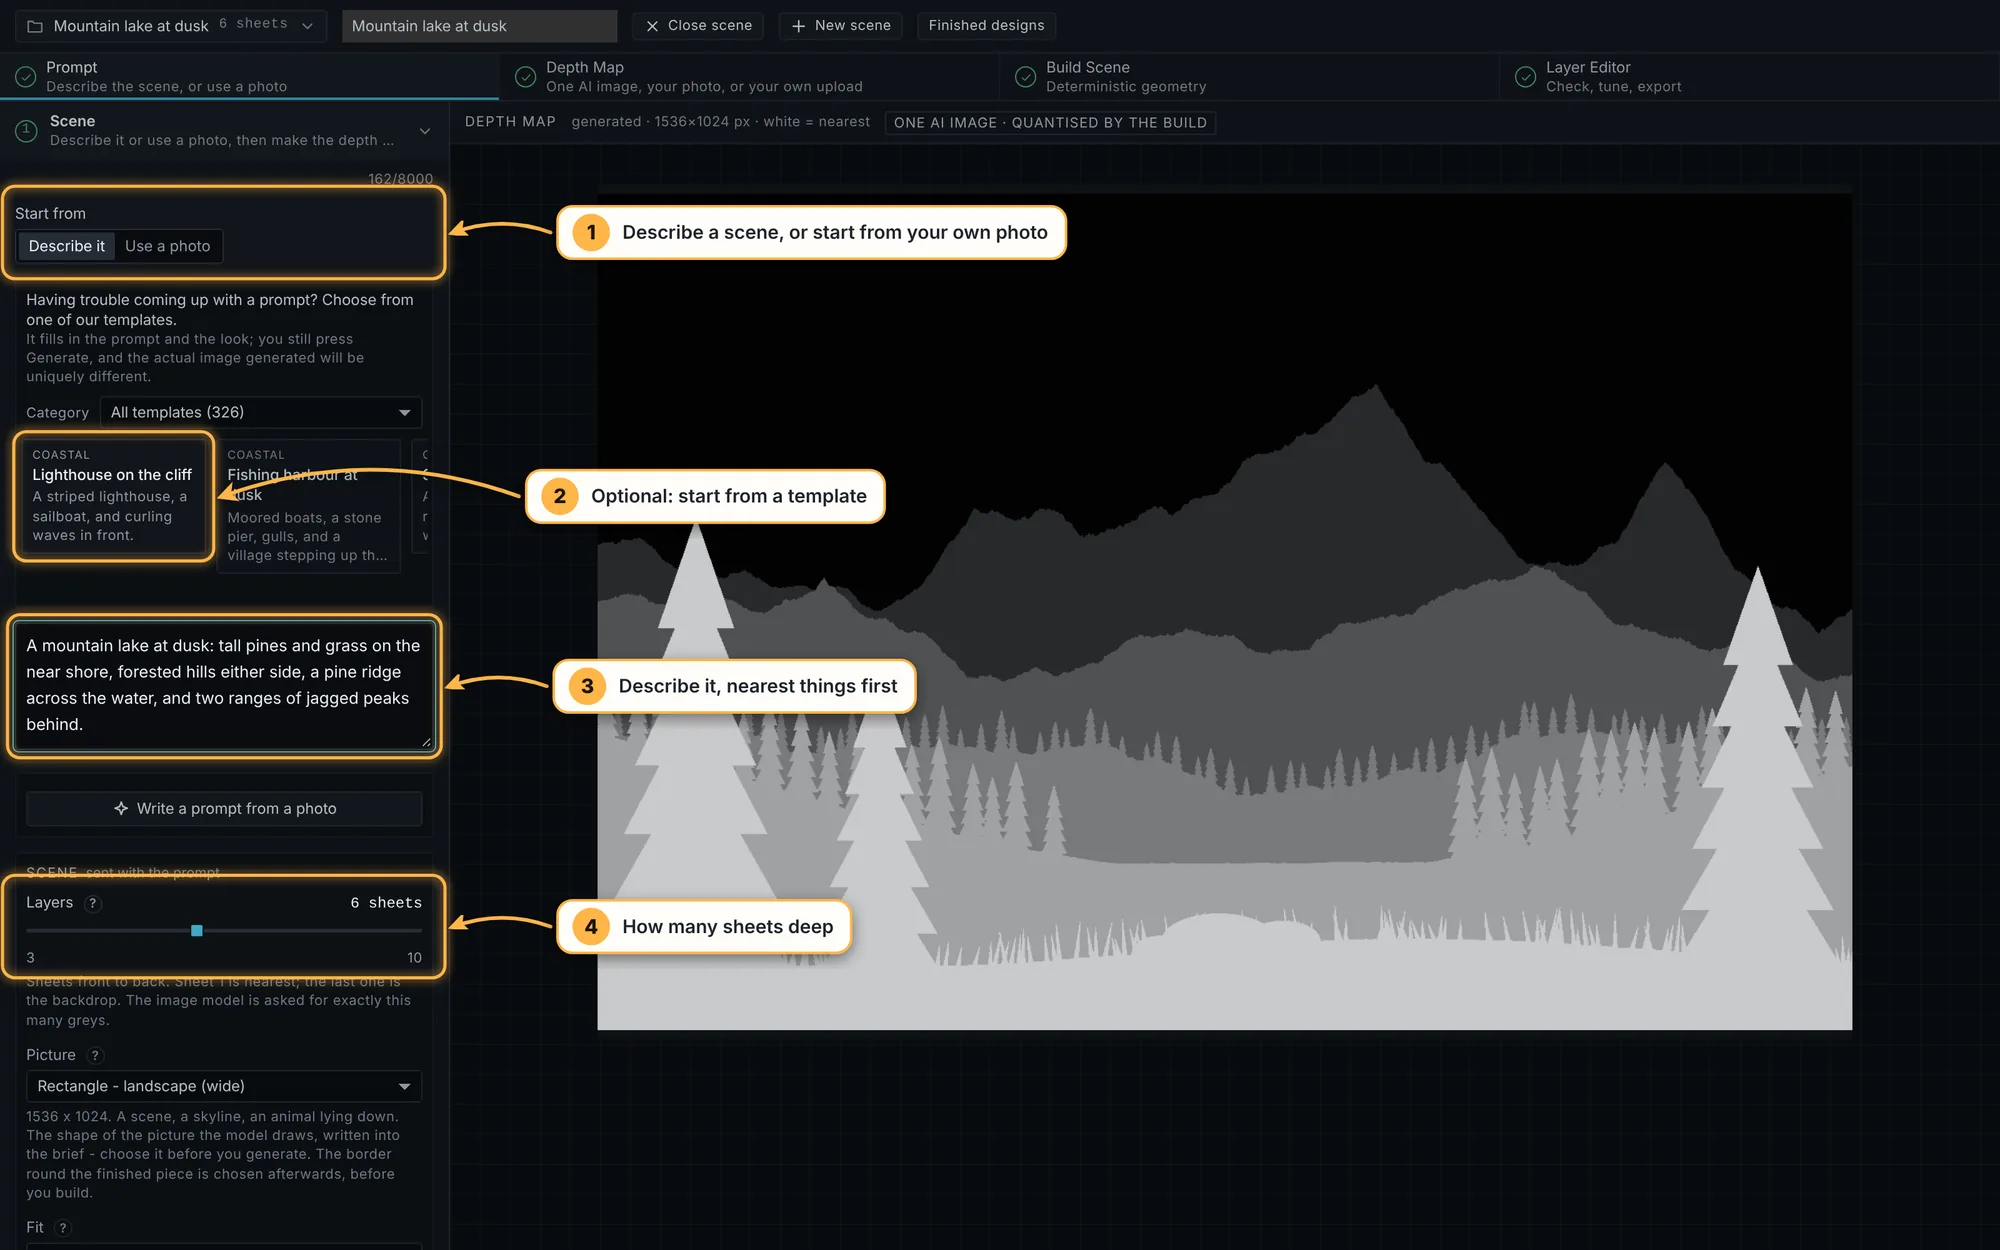
Press New scene, then choose how to start. Describe it means writing the scene in words; Use a photo turns a photo of your own into the scene instead.
Describe the scene nearest things first: "tall pines and grass on the near shore, forested hills either side, a pine ridge across the water, and two ranges of jagged peaks behind". Or pick a card from the template shelf and it fills the prompt in for you. Then set Layers to how many sheets deep the scene should be. Six is a good first scene.
2. Make the depth map
Press Generate Depth Map. The studio asks for one greyscale picture of the whole scene: white is nearest and black is farthest, with one flat grey for each sheet. It appears on the right in about a minute.
If you drew a depth map yourself, press Upload depth map instead.
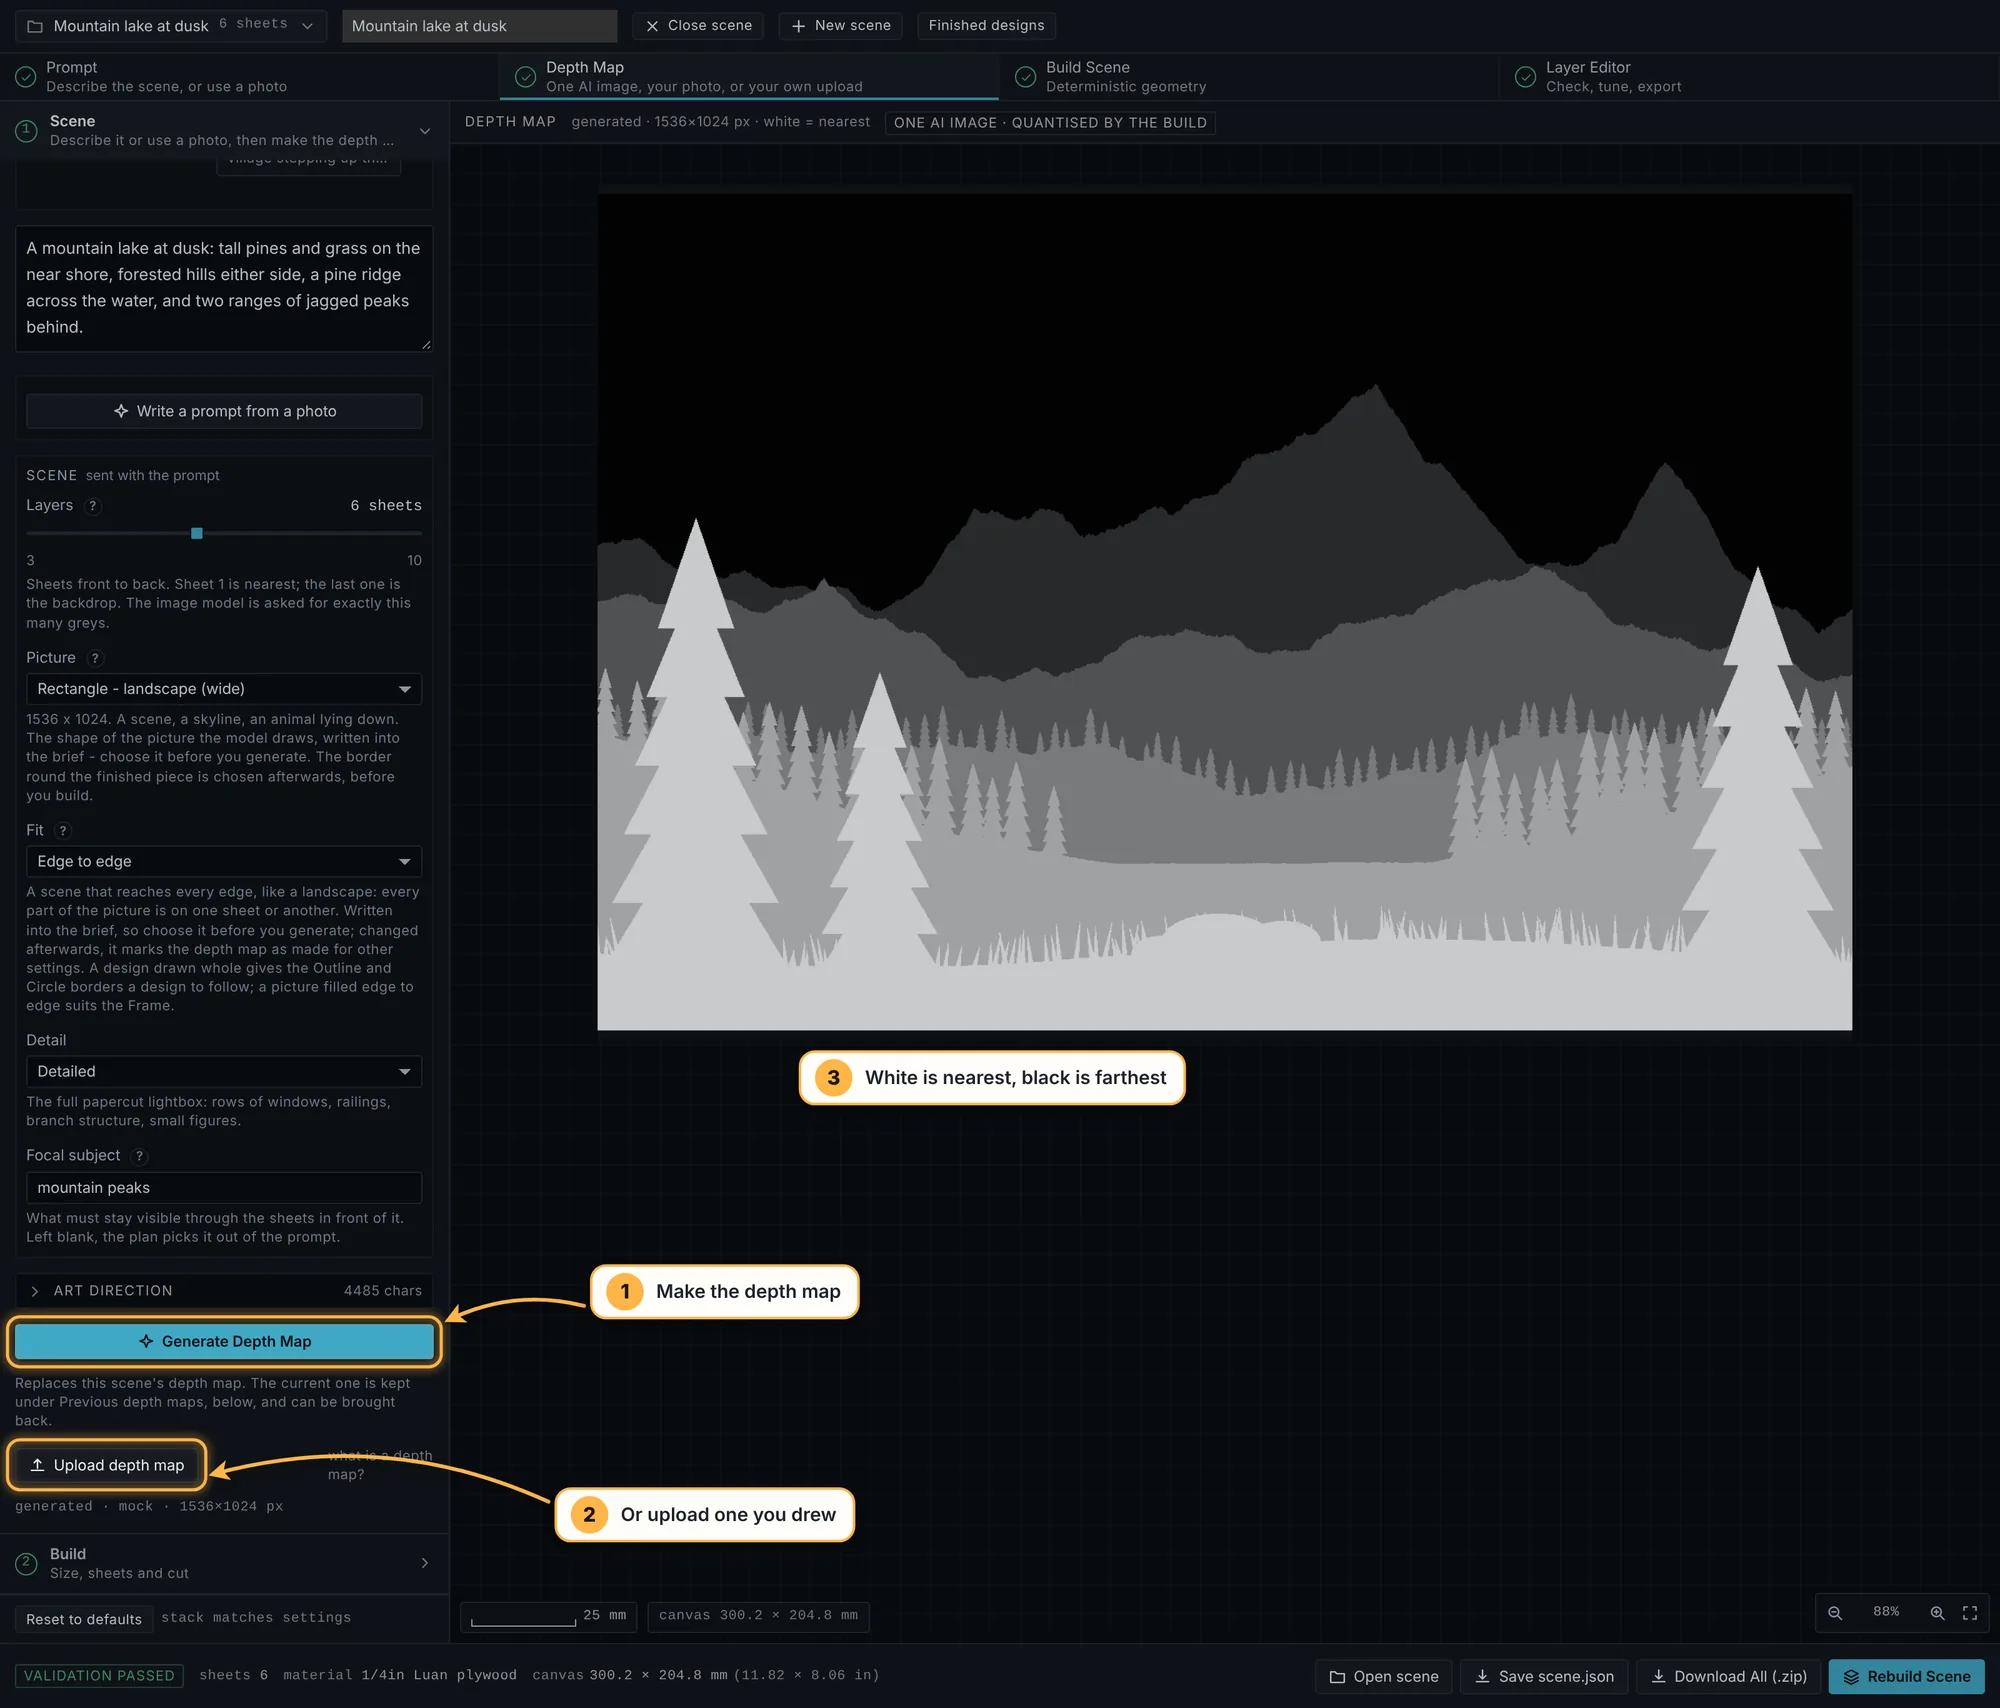
Not what you pictured? The depth map explains how to get a better one, and the previous eight maps stay in the pane so you can go back to one.
3. Choose the size and build
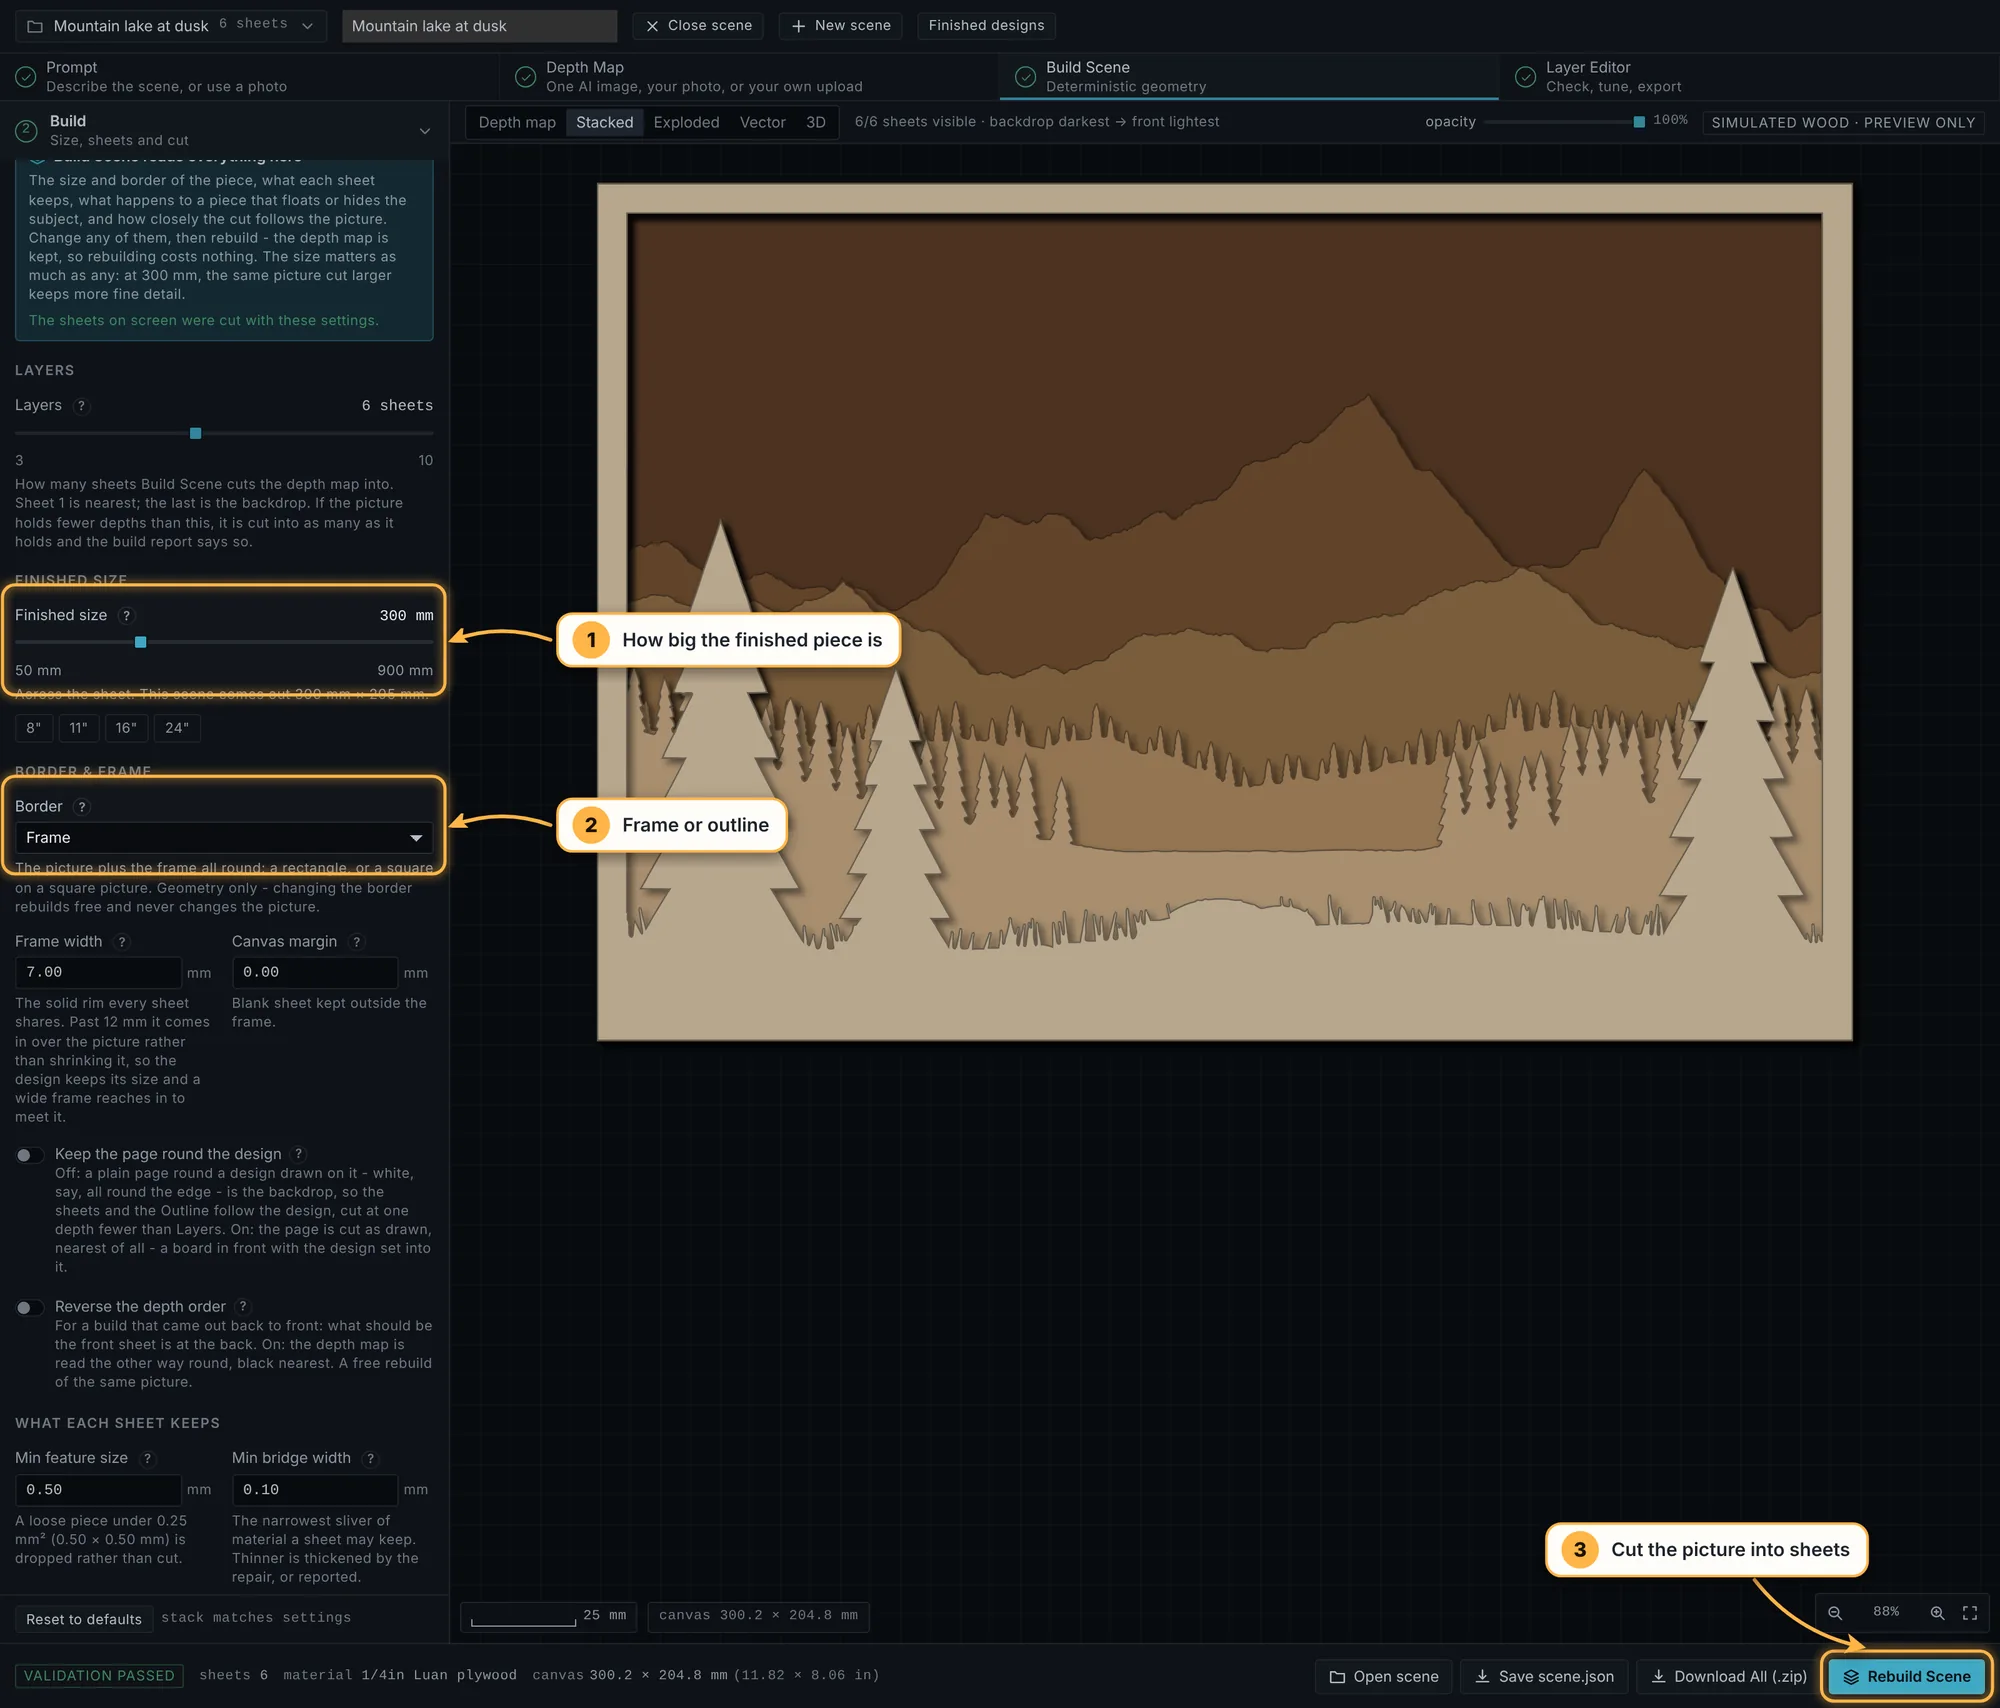
Go to Build Scene and open Build quality in the pane. For a first scene the settings that matter most are:
- Finished size: how wide the finished piece is, with 8", 11", 16" and 24" buttons for common bed sizes.
- Border: Frame puts the scene in a solid frame, as here. Circle and Outline are the other two.
Then press Build Scene at the bottom right. It turns the depth map into sheets in a minute or so, and you can leave the page while it works.
4. Look at your sheets
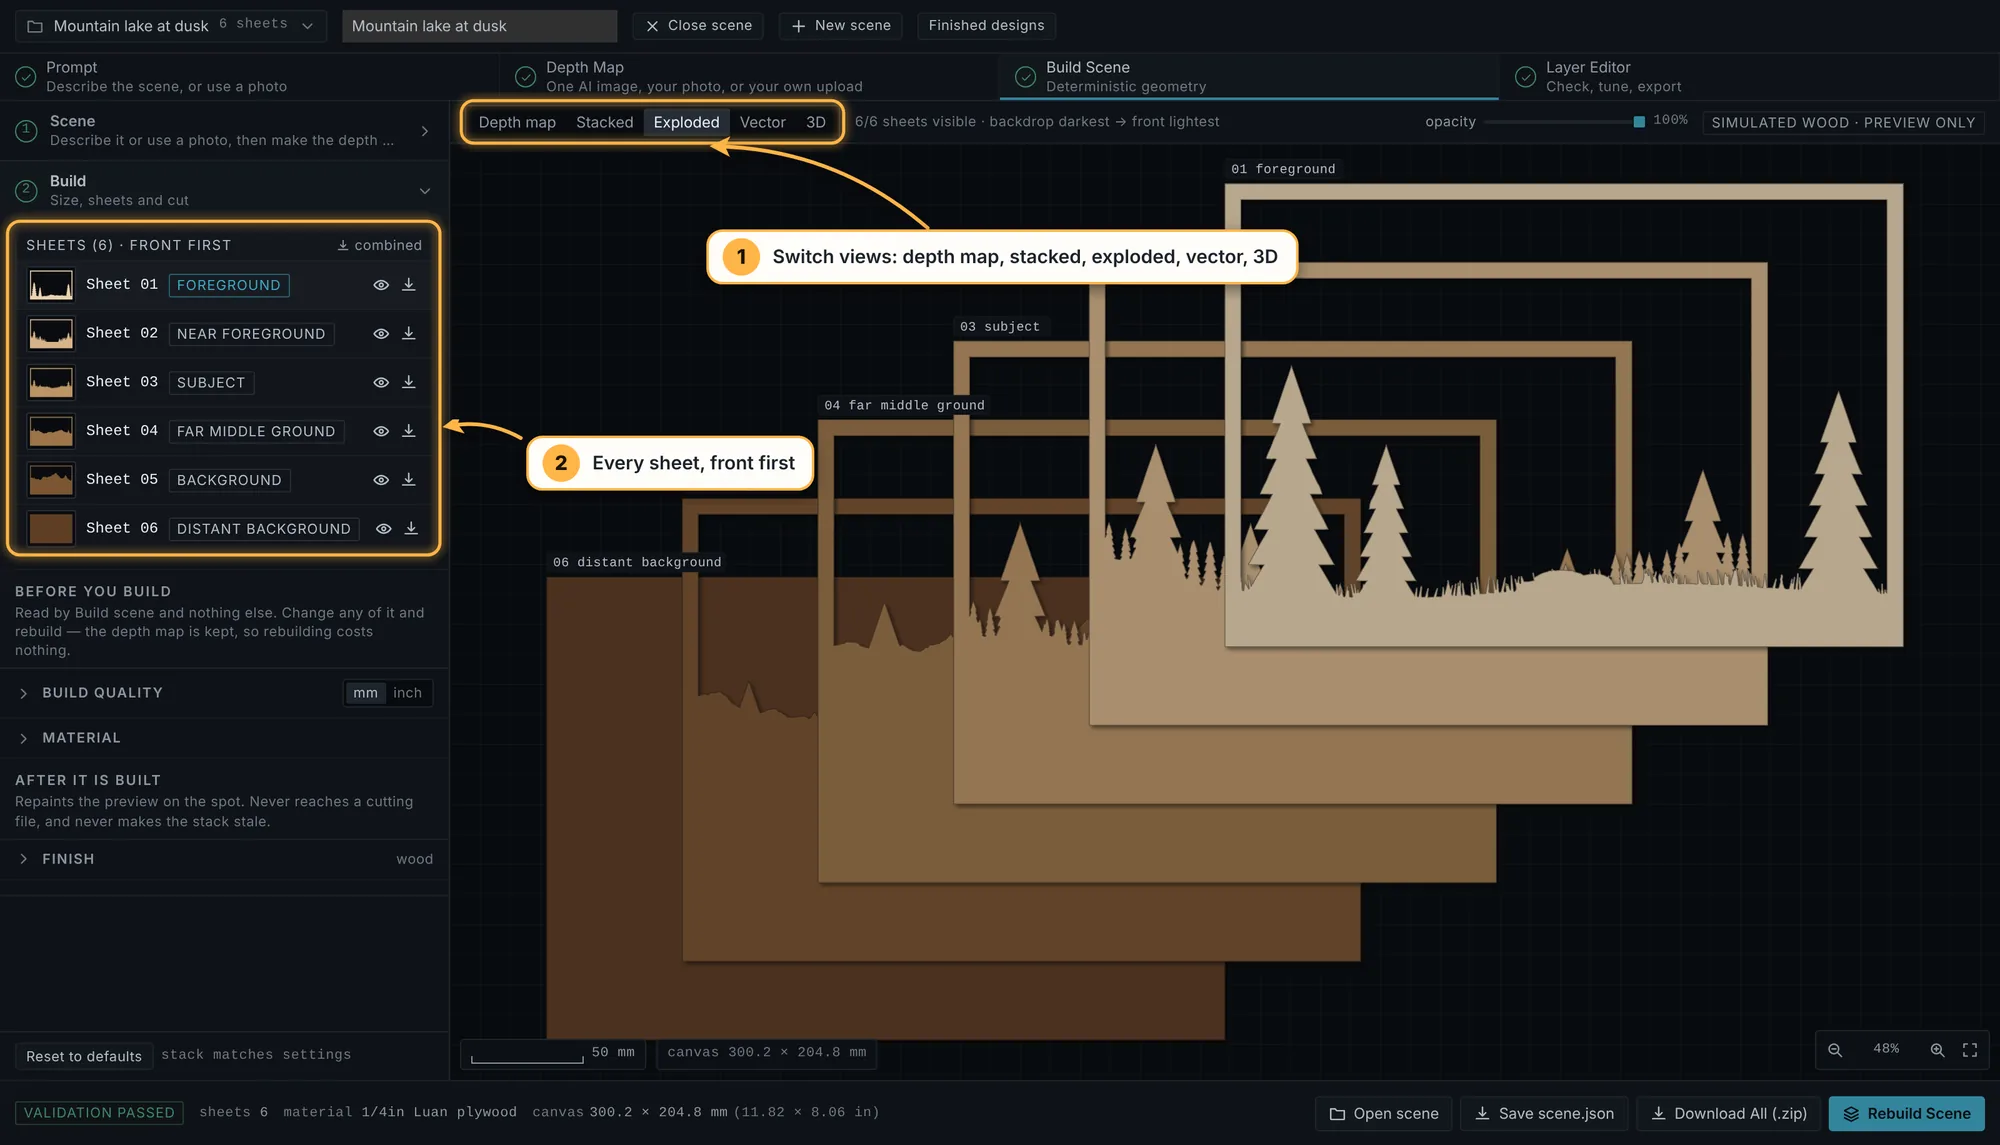
When the build finishes, the buttons above the preview switch between five views: Depth map, Stacked (the finished piece), Exploded (the sheets pulled apart), Vector (the cut lines of one sheet) and 3D. The list on the left has every sheet, front first, each with its own download.
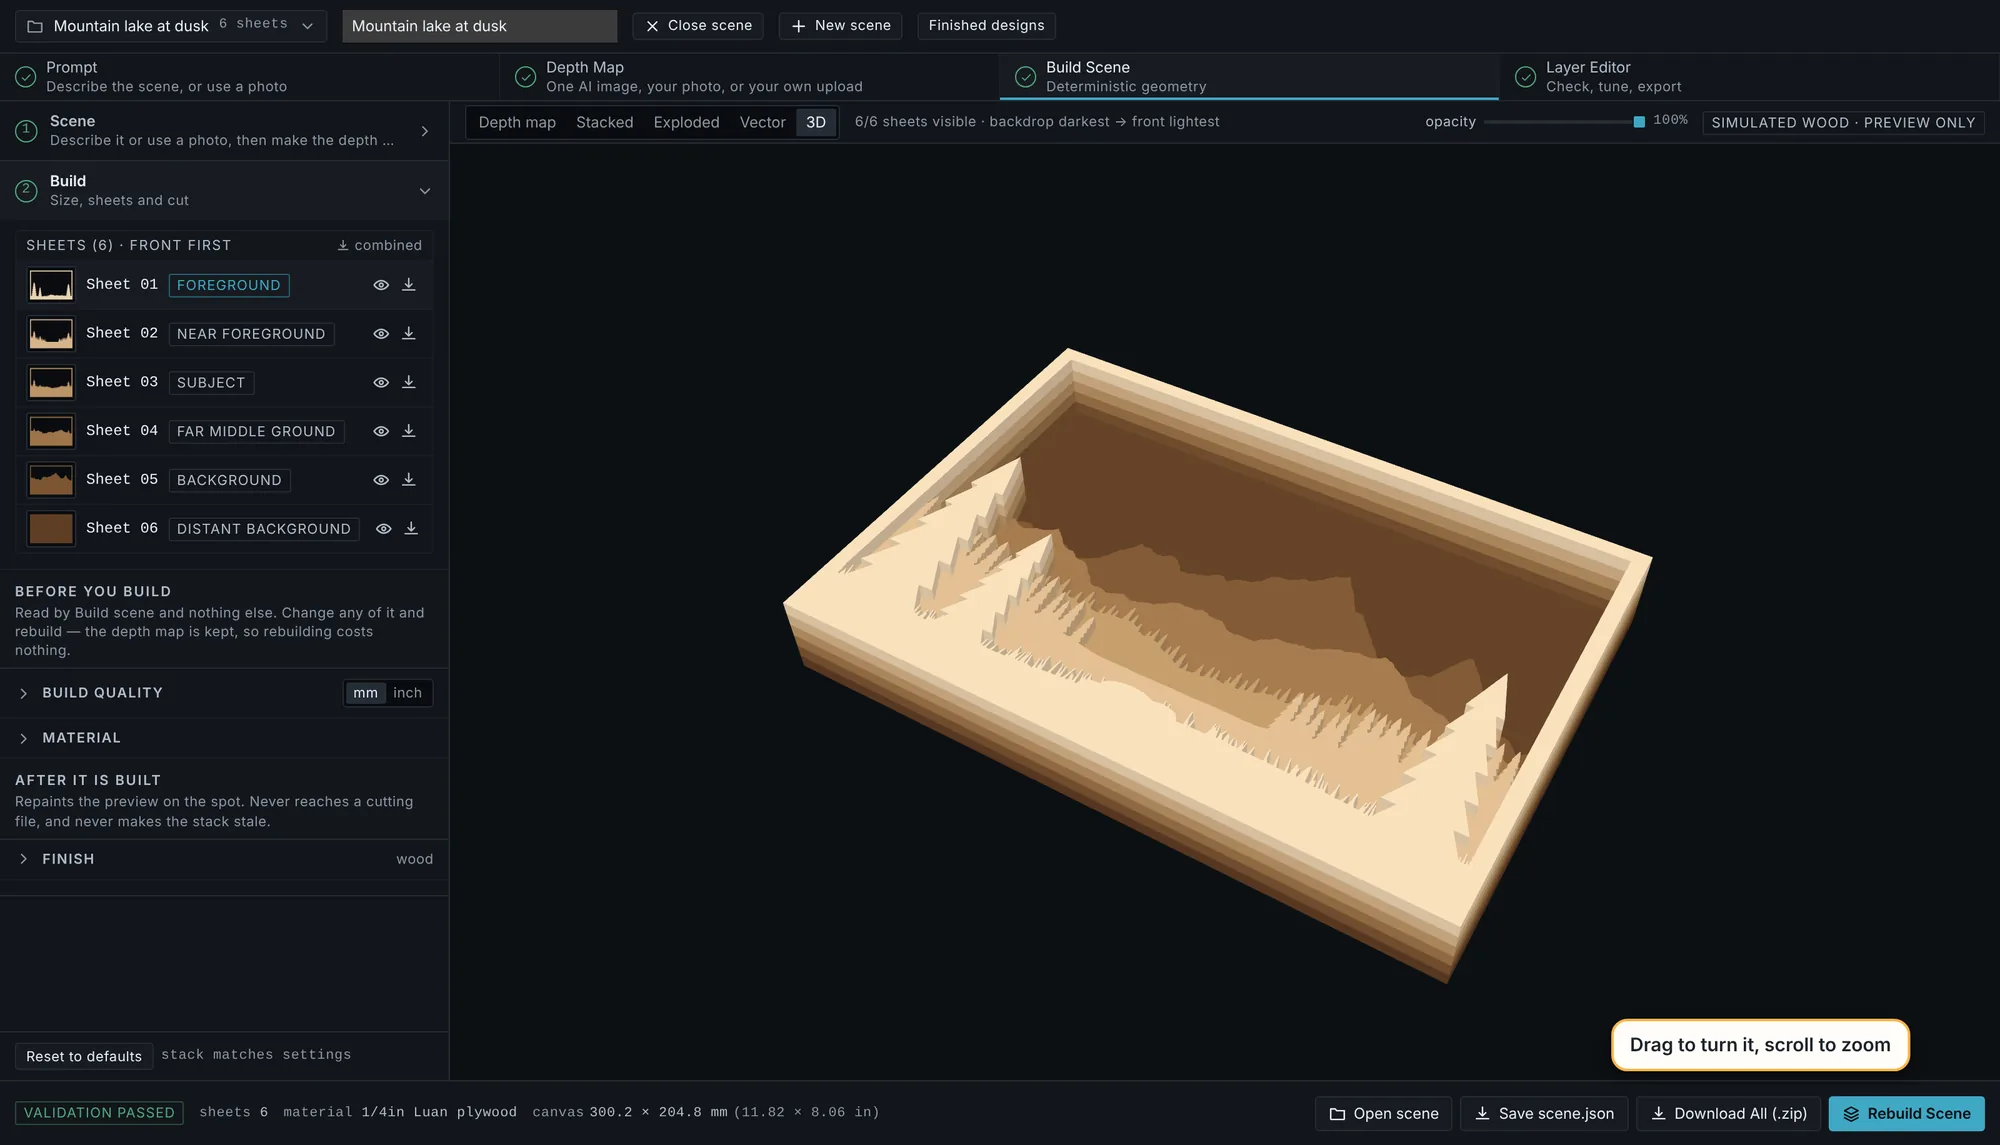
In 3D, drag to turn the scene and scroll to zoom.
5. Try a painted finish (optional)
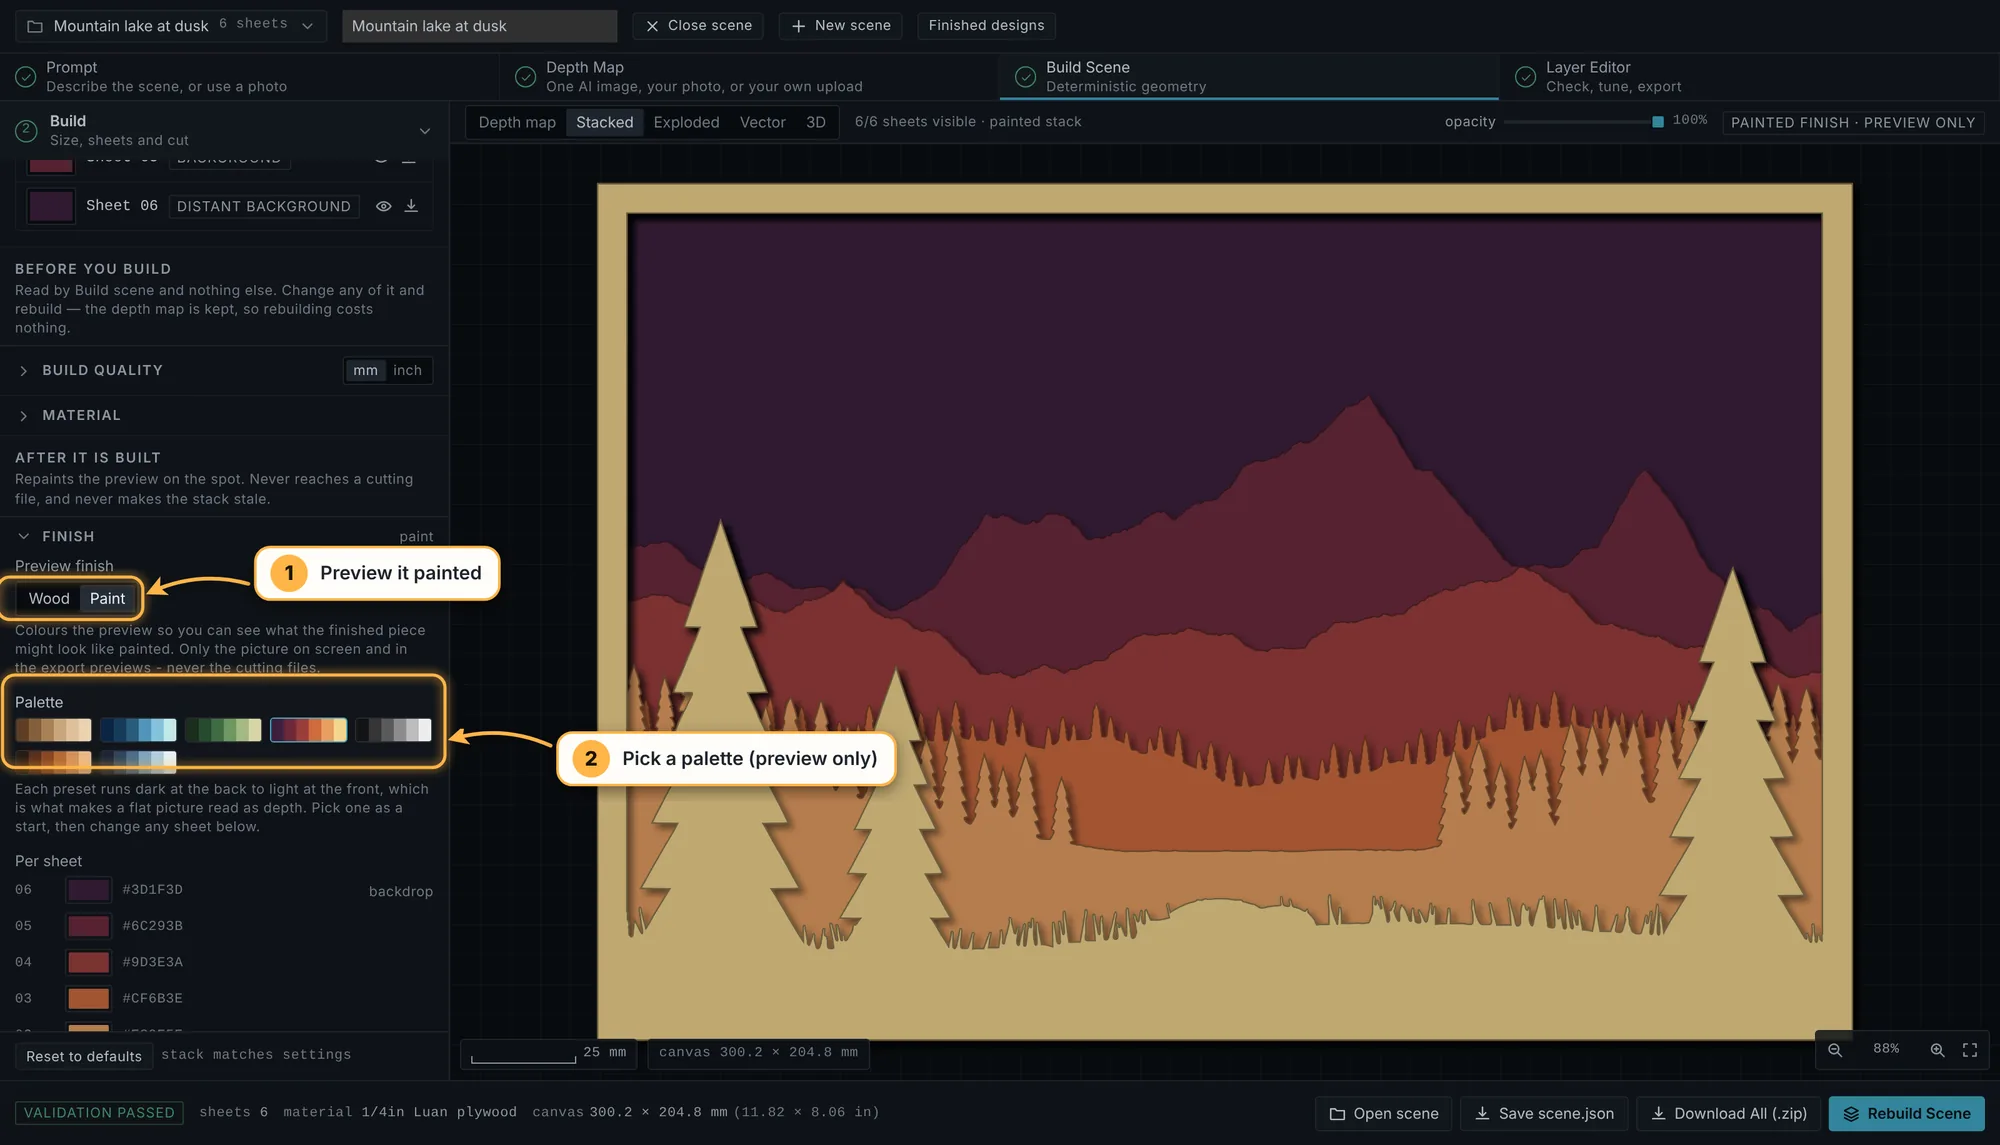
Open Finish and switch Preview finish to Paint to see the scene in colour. The palettes run dark at the back to light at the front, which is what makes a flat picture read as depth. You can also set each sheet's colour yourself underneath. This only changes the preview, never the cut files.
6. Check each sheet
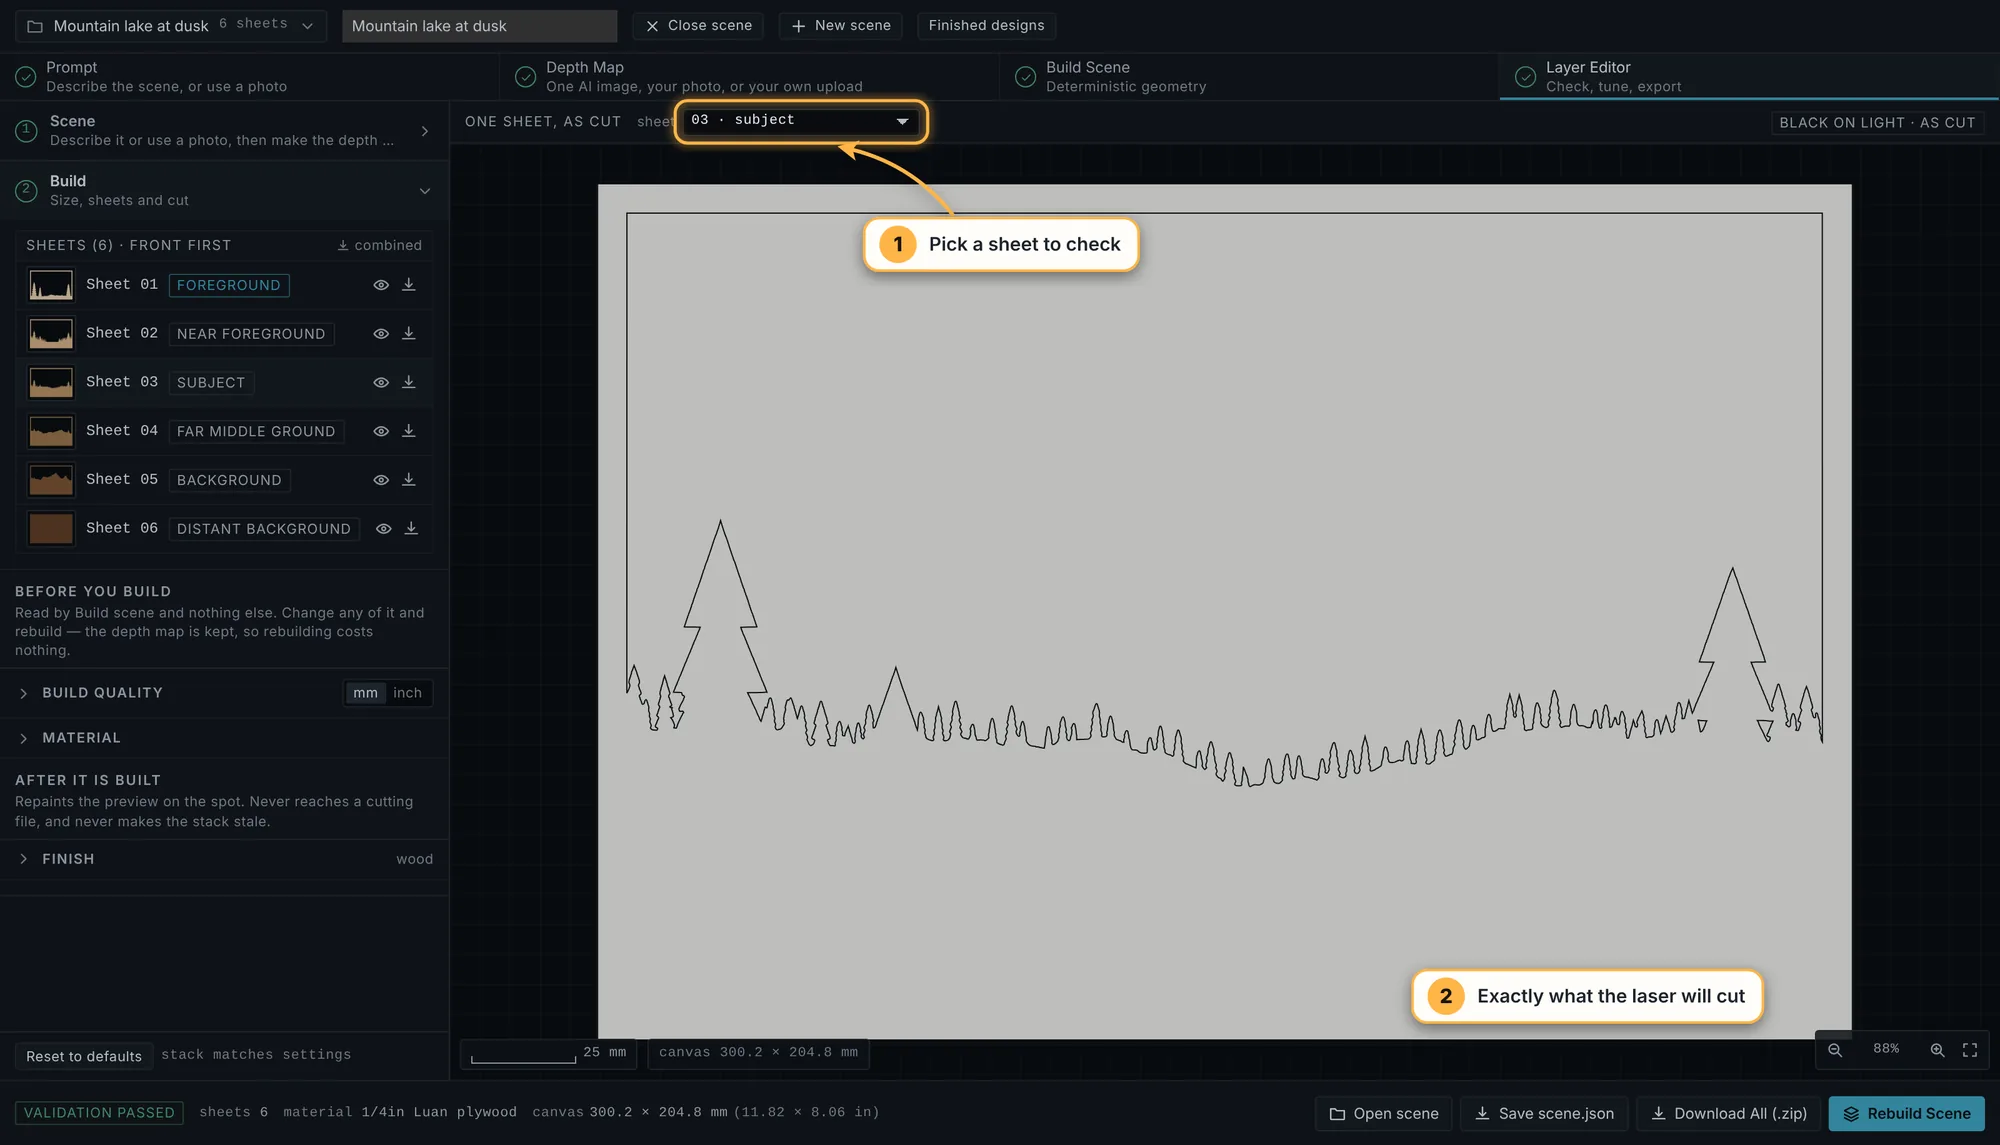
The Layer Editor shows one sheet at a time, black on light, exactly as it will be cut. Choose the sheet from the list at the top.
7. Download your files
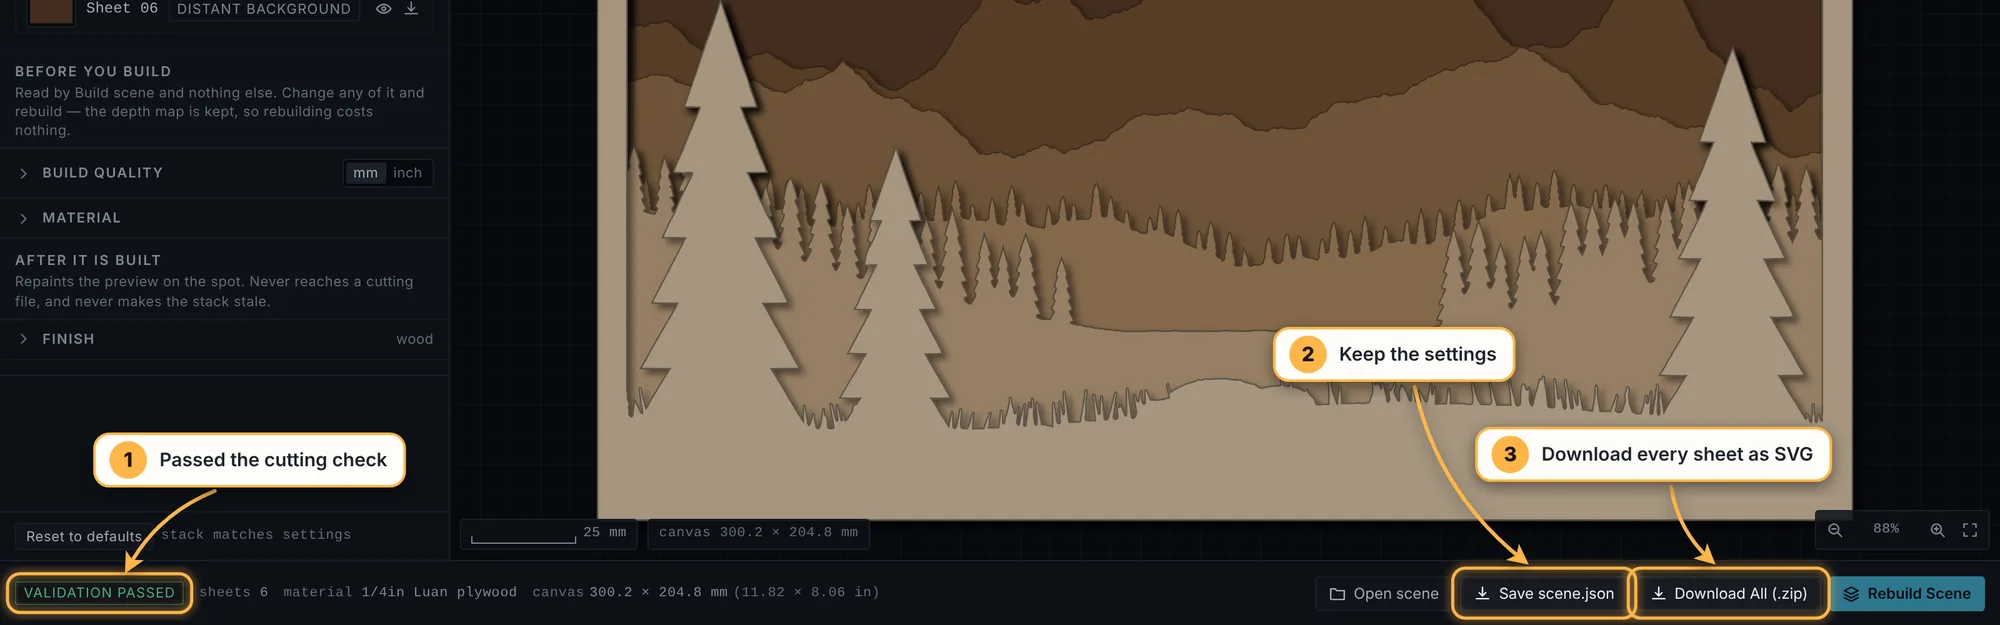
Every build is checked for what goes wrong on a cutter. The badge at the bottom left shows the result, and Validation passed means the scene is ready to cut.
Press Download All (.zip) for every sheet as an SVG. Save scene.json keeps just the settings, if you want to build the same scene again later.
If the check found something, Reading the check explains each message. Then take your files to the laser: Exporting your files and On the cutter cover the rest.
Still stuck? Write to hello@mandalalayers.com — a person reads it, and a photograph of what came off your cutter helps more than a description.